Transfer
This module is used to transfer the data from one database to another corresponding database. It is possible to transfer all the existing data or only a part of the data.
The Transfer module should only be used by administrators having appropriate knowledge of databases.
Before using this program you should always make a backup of the database in order to be able to access the original data and avoid loss of data or similar problems.
es2000 does not make any recommendation regarding the suitability of the following information. Errors and exceptions are excluded and no responsibility is accepted for the information provided. The statements are simply descriptions and do not guarantee the consistency of the products. The information may also in part be regarded as an attempt to provide you with assistance for a task even if the product was not actually intended for this special purpose.
Create transfer
-
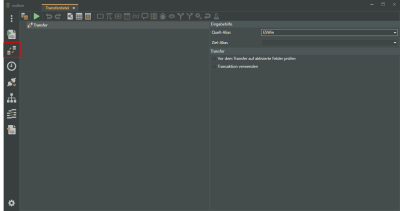
To start a new transfer, click on the icon button
 Create transfer in the esdbm program window.
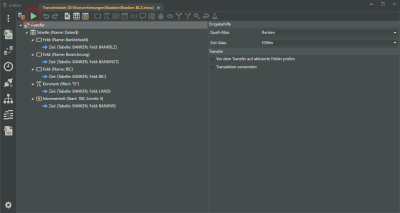
A new tab, Transfer file, opens. The transfer file only contains the main node Transfer.
-
The Source alias and Target alias are specified in the Entry help area.
The transfer reads the data from the source (for example: an Excel table) and transfers them to the target (for example:esoffice database).
By default the alias ESWin is entered as the Source alias in the Entry help area. You can also select a different alias.
The database aliases shown are read out from the dbxconnections.ini file in the esoffice para directory. You can view / edit the database connections under Connection settings.
Log in data
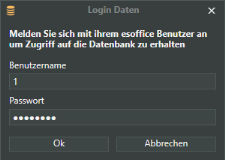
An esoffice user login is required when a module is opened or a function that acesses an esoffice database is executed.
The user requires 110 - Basic settings authorization.
If you have successfully logged in to an esoffice database (alias) in esdbm, your log in data will not be requested again when you access the database alias again.
Check for active fields before transfer
If the Check for active fields before transfer option is activated, a query is displayed which asks you to select the fields and tables to be transferred when you execute a transfer manually.
The Active option can be used to specify this for type Table and Field transfer nodes.
This option is ignored for an automatic transfer made by Schedule.
Use transaction
Activate the Use transaction option when it is necessary that all steps in the transfer are completed without errors to preserve consistency of the data.
A Transaction is a number of database changes that are / must be performed together.
Thus, for example, booking a sum of money (as a transaction) is characterized by two database operations: Withdrawal of the money from account A and Deposit of the money in account B.
If complete processing of the elementary database operations in a transaction cannot be completed (for example because of an error), all the changes made to the data will be reset to the original state.
-
You must first select a table or define an SQL command to edit a transfer file. The transfer functions for this are provided by the corresponding icons at the top of the tab.

The icons are described in detail later in this Help.
A table is used in the following example.
Click on the Table icon
 .
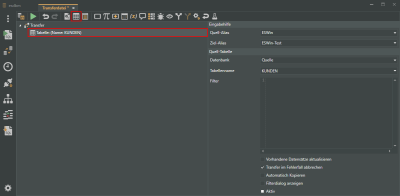
.A new entry named Table will be visible below the Transfer entry, and the Source table area is displayed on the right.
A search in the tables is started by means of the alias entry fields (Source / Target alias), which marks the nearest matches to make selection quicker and easier. The name is entered when you press the Enter key following a successful search.
You can now select under Database whether a table from the source or the target database is to be selected.
Under Table name, select a table from the database.
You can now make the individual assignments for the data transfer. The transfer file is displayed on the left of the window.
-
A tree structure is used as the representation. The individual nodes can be expanded or collapsed.
Entries within this tree structure can be moved anywhere using drag and drop as long as they are correctly assigned syntactically. All the relevant fields must be completed for the assignment. No other action can be started until this has been done. A red circle after an entry field indicates that this field must be completed.
Various icons are used to differentiate between the different types of assignment and make them easier to visualize.
-
Save the transfer file using the
 File menu.
 Create copy script
You can create a copy script to transfer data between databases that have the same structure as far as possible.
THis is described under Create copy script
 Start transfer
This function is used to execute a transfer that has already been created. This allows you to start a transfer using an existing transfer description / transfer file.
This transfer description must be in XML format. If no transfer file is present yey, you can generate a transfer file using the ![]() Create transfer menu command.
Create transfer menu command.
You can also define a Schedule for scheduled execution of transfer files.
![]() Start transfer
Start transfer
-
Create a new transfer or load an existing transfer file using the
 File menu.
 -
Click on the
 Start transfer button in the toolbar.
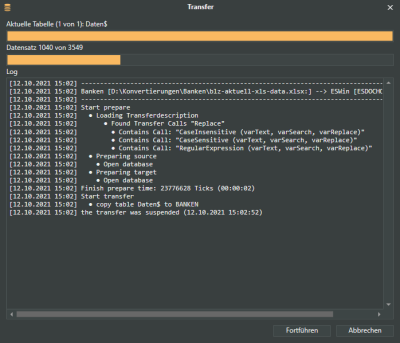
Transfer of data from the source to the target is started. A log window with a progress bar is displayed.
You can pause the transfer using the Pause button and resume it using the Resume button.
Activated fields
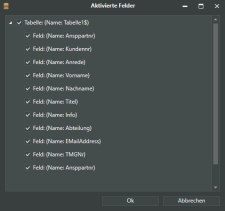
If you have activated the Check for active fields before transfer option for the transfer main node, a list of fields from the transfer file will be displayed after starting the transfer.
You can exclude a field or table from the transfer by deactivating the option in front of the field or table.
Show filter dialog
If you have activated the Show filter dialog option for a Table, a dialog for the source data filter opens before actual execution of the transfer.
The transfer does not start until you confirm the filter dialog by clicking on the OK button.
Execution of the transfer is stopped if errors occur during the transfer and the Cancel transfer on error option is activated for a Table.
If the option is not activated, the transfer will continue despite the errors. The error messages will always be displayed in a log window.
-
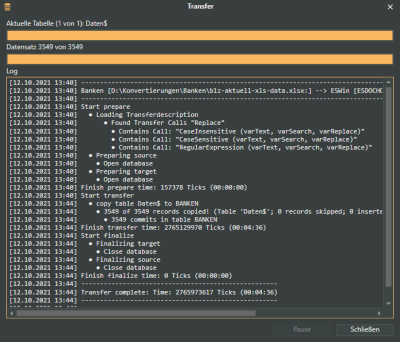
After the transfer of the data the log window shows a summary of the transfer. Here you can see how many data sets were transferred / updated.
You can select the text in the Log area and copy it to the clipboard using the Copy command in the context menu.
The log messages can no longer be accessed when you close the log window. You can create a log file in a directory of your choice using the Log message function in the transfer.
-
Click on the Close button to end the transfer.
Transfer functions
The following icon buttons are provided in the toolbar for creating a transfer / transfer file.

The icons correspond to the following transfer functions:
Case only in connection with Switch
Icons in the transfer tree
There are additional icons used within the transfer tree:
![]() CATCH
CATCH
![]() DEFAULT
DEFAULT
![]() SET VARIABLE / VALUE
SET VARIABLE / VALUE
Transfer file / Transfer tree
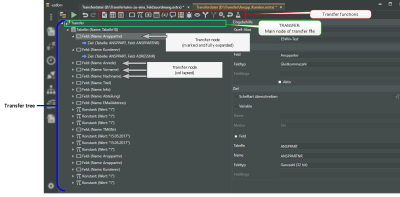
The basic structure of a transfer file looks like this in the transfer module of esdbm:
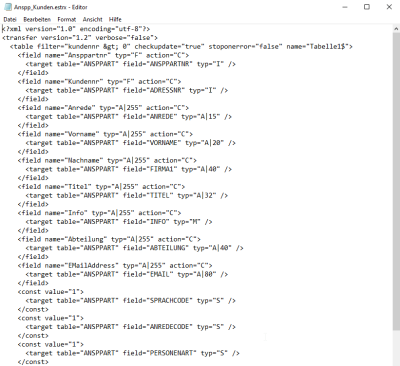
The same XML transfer file opened in a Windows editor (Notepad):
XML
An automatically generated XML declaration that indicates the version and character coding.
Information on how to edit an XML transfer file is found under XML format description
Transfer
Main node of assignments made
Node
Transfer functions
Context menu
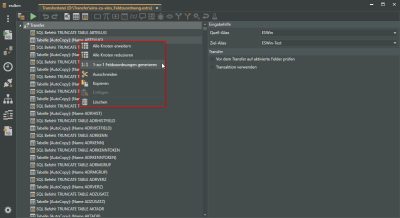
You can right click within the transfer script to open functions from the contaxt menu.
The functions always apply to the node in the transfer tree that is selected by the right click.
![]() Expand all nodes
Expand all nodes
All the nodes set in the transfer description are shown expanded / opened by this.
![]() Collapse all nodes
Collapse all nodes
The nodes set in the transfer description are shown collapsed / closed.
![]() Generate 1 to 1 field assignments
Generate 1 to 1 field assignments
The ![]() Generate 1 to 1 field assignments context menu command is only available for Table type nodes. If you select Generate 1 to 1 field assignments for a table, all the fields of the corresponding table will be inserted as a single node below the table.
Generate 1 to 1 field assignments context menu command is only available for Table type nodes. If you select Generate 1 to 1 field assignments for a table, all the fields of the corresponding table will be inserted as a single node below the table.
This function is required, for example, if you wish to explicitly exclude certain columns from a transfer using the Transfer function. You can then delete the corresponding fields from the list.
![]() Cut
Cut
The selected transfer node is cut out of the transfer tree and placed on the clipboard.
The node can be inserted in a different position in the transfer tree using the ![]() Paste function.
Paste function.
![]() Copy
Copy
The selected transfer node is copied to the clipboard. The copied node remains in the transfer tree.
The node can be inserted in a different position in the transfer tree using the ![]() Paste function.
Paste function.
![]() Insert
Insert
This command is used to insert (paste) a transfer node back into the transfer tree from the clipboard.
![]() Delete
Delete
Deletes the selected transfer node from the transfer tree.
You can undo a delete using the ![]() button.
button.
Keyboard shortcuts
The following keyboard shortcuts are available in the Transfer module.
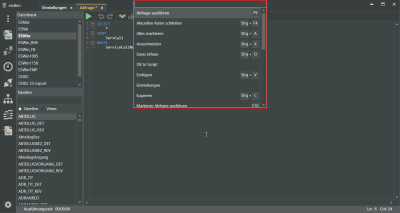
Show all commands
Ctrl + Shift + P
Displays all the commands available for the opened module including key combinations in a window.
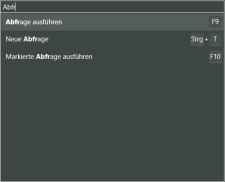
You can also search for commands in the command window.
Open file
Ctrl + O
Open new query
Ctrl + T
Close current tab
Ctrl + F4
Search
Ctrl + F
Save
Ctrl + S
Save as
Ctrl + Shift + S
