Schema
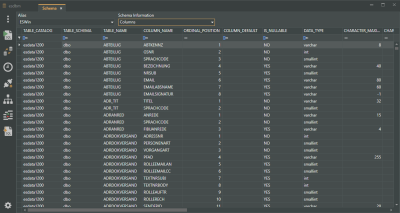
The Schema module displays the database structure of the selected alias depending on the database.
All fields, sizes, field names, field lengths, etc. are listed.
Depending on the SQL database system used (MSSQL or Firebird), different schema information can be available.
To display the database schema of a database (alias), click on the icon button ![]() Schema in the esdbm program window.
Schema in the esdbm program window.
Alias
Select a database alias from the list.
The alias ESWin is entered by default. You can also select a different alias.
The database aliases shown are read out from the dbxconnections.ini file in the esoffice para directory. You can view / edit the database connections under Connection settings.
Log in data
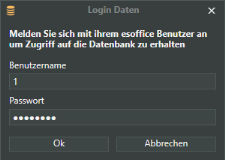
An esoffice user login is required when a module is opened or a function that acesses an esoffice database is executed.
The user requires 110 - Basic settings authorization.
If you have successfully logged in to an esoffice database (alias) in esdbm, your log in data will not be requested again when you access the database alias again.
Schema information
Select the desired Schema information for the selected alias.
Depending on the SQL database system used (MSSQL or Firebird), different schema information can be available.
Columns
Columns / fields of a database
IndexColumns
Index columns / fields of a database
Procedures
Saved database procedures
Tables
Tables in the database
Triggers
Triggers present in the database with their associated table
Users
Database users
Views
Database views
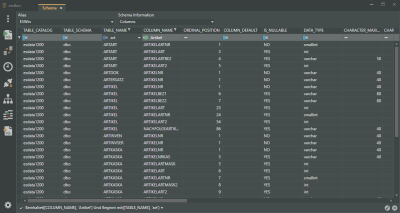
After a Schema information has been selected, the corresponding values are shown in the list below it.
These values can be further reduced, grouped, and sorted by means of filters.
The displayed schema information can be further reduced by means of filters (for example: show all fields / columns named ClientNo).
Column filters
You can use column filters to display only certain data sets from extensive lists.
You can use the column filters for example to display all the database columns with a particular name in all tables. Only the table names that exist in the tables will be displayed.
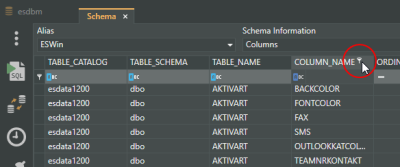
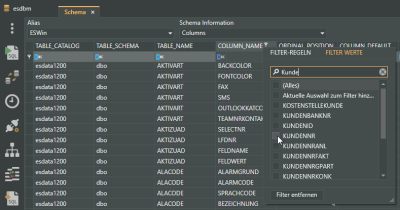
To filter the data sets, click on the desired column (for example COLUMN_NAME) and on the filter icon ![]() there.
there.
You will now see a list of all the recorded ZIP codes.
You can now select one or more values for the filter.
If a filter is active for a column, this is indicated by the filter icon ![]() in the column header. Click on the icon to edit the filter.
in the column header. Click on the icon to edit the filter.
To remove the filter, right click on the column header and select the Remove filter command in the context menu.
Further filter functions
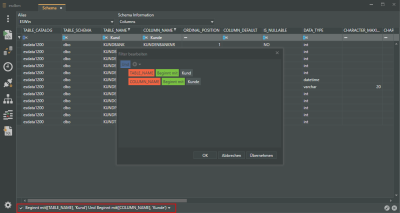
Right click on the column header and select Edit filter from the context menu. A dialog for creating complex filters opens.
The available operators are described below.
Create the desired filter conditions and then click on the OK button.
The filter dialog closes and the filtered list is displayed according to the set conditions. The filter conditions are displayed in the status bar.
Filter field
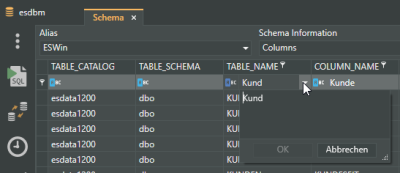
Filters can also be set using the field below the column header.
A filter condition and an operator can be set in this field.
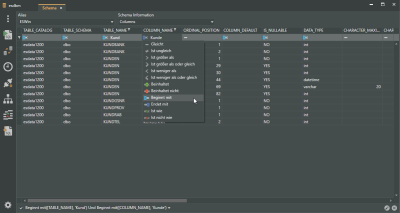
Criterion operators
The following criterion operators can be used:
Only certain operators may be available depending on the type of field selected.
Equals
The contents of the selected field are equal to the search / filter term entered.
Not equal to
The contents of the selected field are not equal to the search / filter term entered (no match).
Greater than
The contents of the selected field are greater than the search / filter term entered.
Greater than or equal to
The contents of the selected field are greater than or equal to the search / filter term entered.
Less than
The contents of the selected field are greater less the search / filter term entered.
Less than or equal to
The contents of the selected field are less than or equal to the search / filter term entered.
Starts with
The contents of the selected field start with the search / filter term entered.
Does not start with
The contents of the selected field do not start with the search / filter term entered.
Contains
The contents of the selected field contain the search / filter term entered as partial text.
Does not contain
The contents of the selected field do not contain the search / filter term entered as partial text.
Ends with
The contents of the selected field end with the search / filter term entered.
Is like
The contents of the selected field correspond to the pattern entered.
Placeholde character for pattern search
% (percent character)
The percent character % can be entered as a placeholder for any character.
Thus if you enter N%a%, this will find Name and also Nicholas.
Is not like
The contents of the selected field do not correspond to the pattern entered.
Placeholde character for pattern search
% (percent character)
The percent character % can be entered as a placeholder for any character.
Thus if you enter N%a%, this will find Name and also Nicholas.
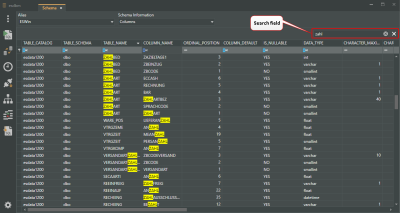
You can also start a full text search within the displayed information.
Right click on the column header and select Show search field from the context menu.
A search field is displayed above the column headers. Type the search term in the Search field and press Enter to confirm.
All the locations found will be highlighted in color in the list.
The values in a column can be sorted in ascending or descending order by clicking on the table column header.
Context menu
Right click on the column header. Further sort functions are provided in the context menu.
Sort ascending / Sort descending
A further way to sort the data in the list view is to right click on the column header and select Sort ascending / Sort descending in the context menu.
Remove sorting
Removes all the sorting that has been done.
Multiple column sort
You can select more than one column for sorting by selecting them with the Shift key pressed.
To group the data sets according to identical data sets in a column, do the following:
Method 1
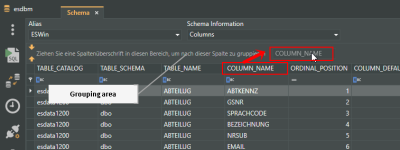
Left click and drag the desired column into the Grouping area.
If the Grouping area is not displayed, right click on the list header line and select Show grouping field from the context menu.
Method 2
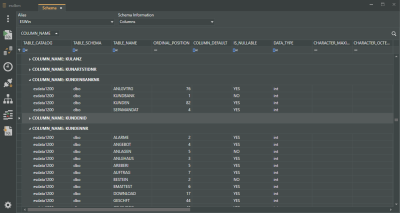
Right click on the desired column header and select Group by this column from the context menu.
Both methods result in the data being grouped according to the selected criterion and displayed.
The lists are always opened without grouping.
Expand grouping
You can expand grouping by further subdividing already grouped data according to additional criteria. To do this, drag further column headers into the Grouping area or use the Group by this column command in the context menu.
Ungroup
To ungroup, right click in the Grouping area and select the Ungroup command in the context menu.
Move columns / Change column order
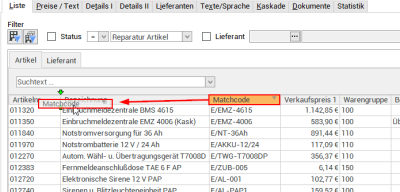
Each user can set the column order individually. To move a column, click on the column and hold down the left mouse button, drag it to the desired position between two columns and release the mouse button (drag and drop).
Suitable locations for inserting a column are marked with two green arrows.
Column editor
You can include hidden columns in the list / table view again using this function. An additional window (Column editort) that shows all the hidden columns is displayed for this.
Click on the required column and hold down the left mouse button, drag it to the desired position between two columns and release the mouse button (drag and drop). Suitable locations for inserting a column are marked with two green arrows. The column is then inserted at the position under the mouse pointer.
Optimum width
Adjusts the column width to automatically match the contents. Right click on the column header and select Optimum width from the context menu.
Use the Save layout function to permanently store the changed column width.
If you do not save the Layout after changing the column width, the column width will be reset when you restart the module.
Optimum width (all columns)
Adjusts the column width to automatically match the contents for all columns. Right click on the column header and select Optimum width (all columns) from the context menu.
Use the Save layout function to permanently store the changed column width.
If you do not save the Layout after changing the column width, the column width will be reset when you restart the module.
