Installation and configuration of a Microsoft SQL server for use with esoffice / eserp
Requirements
Please note the following requirements for use of a Microsoft SQL server with esoffice / eserp:
The Express edition or the Developer edition of the Microsoft SQL server are not suitable for use with esoffice / eserp.
Installation
The following example describes a new installation of a Microsoft SQL server 2019 on a windows server operating system.
es2000 does not make any recommendation regarding the suitability of the following information. Errors and exceptions are excluded and no responsibility is accepted for the information provided. The statements are simply descriptions and do not guarantee the consistency of the products. The information may also in part be regarded as an attempt to provide you with assistance for a task even if the product was not actually intended for this special purpose.
MSSQL server installation
-
Start the SQL server installation from the CD or downloaded file.
-
In the first installation window, select New standalone SQL server installation or Add functions to an existing installation.
-
In the next step, you can optionally run Windows Updates to check for any updates. You can skip this step by clicking on Next.
-
The installation rules are determined in the next installation step. If an error is displayed during this step, please follow the directions given in the Microsoft online help, or contact your system administrator.
If warning messages concerning the Windows firewall are displayed, follow the instructions that are shown when you click on the warning.
Click on Next to continue.
-
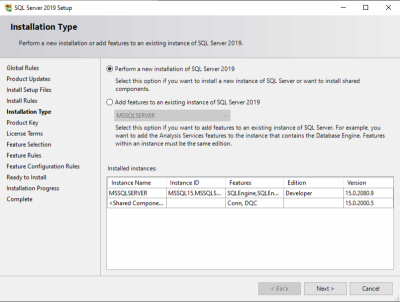
Select the option New SQL Server [version no.] installation in the Installation type area.
Click on the Next button.
-
In the next steps, enter the Product key and confirm the Licence conditions. Click on the Next button each time to move to the next step.
-
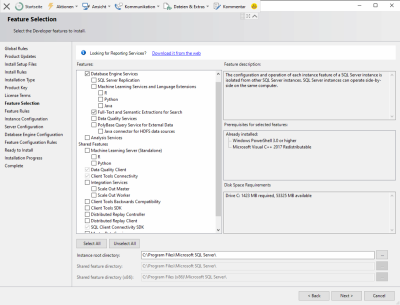
Activate the following options in the Function selection area:
-
Database Engine Service
-
Full text and semantic extraction for search
All other functions can be deselected or optionally installed.
If necessary, the Instance root directory can be changed.
When you have made the settings, click on the Next button.
-
-
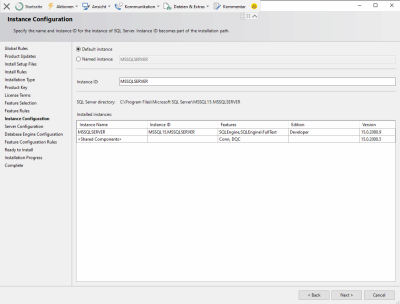
Activate the Standard instance option in the Instance configuration area and click on the Next button.
The standard instance is used in this example. It is also possible to use an individually named instance.
-
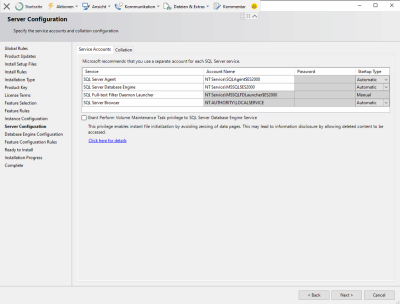
In the Server configuration area, set the Start type for the SQL server database module, SQL server agent, and SQL server browser services to Automatic. Click on the Next button.
-
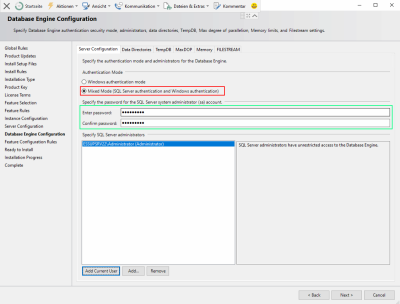
In the Database module configuration area on the Server configuration tab, activate the Mixed mode (SQL server authentication and Windows authentication) option under Authentication mode.
Add a Windows account for the SQL server administration.
Assign a secure password to the SQL server system administration account (user SA). Click on the Next button.
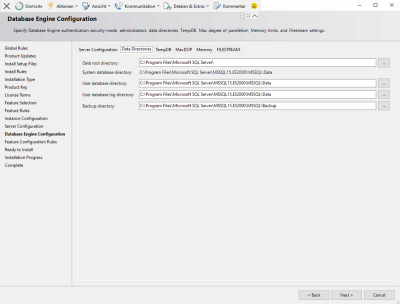
You can individually specify the directories for the databases on the Data directories tab.
Please take the available free memory space into consideration.
Subdirectories of the installation path are entered by default.
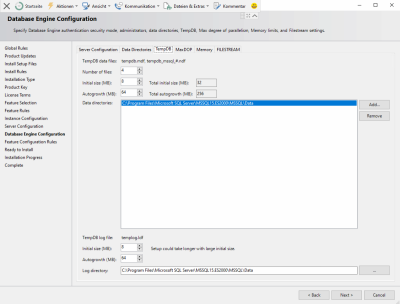
Specify the information on the TempDB tab as follows:
TempDB data files
-
Number of files: 4
-
Initial size (MB): 8
-
Autogrowth (MB): 64
TempDB log file
-
Initial size (MB): 8
-
Autogrowth (MB): 64
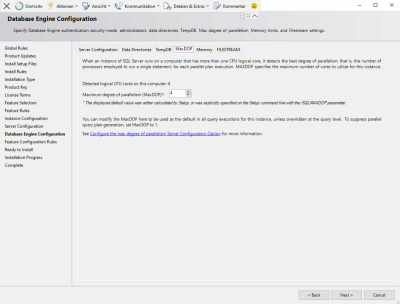
Set the values for simultaneous use of the processor cores for the SQL server instance on the DataMaxDOP tab. This will depend on the available number of processor cores. The default value will be determined by the installation program.
Click on the Next button.
-
-
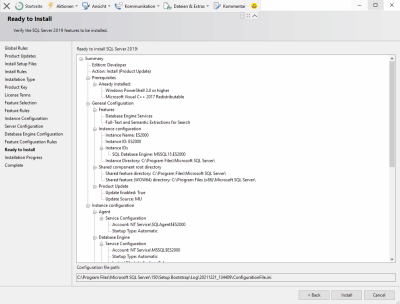
All the settings that you have made for the installation are displayed once more.
When you have checked that everything is correct, click on the Install button.
-
Installation will now take place. The process can take up to 30 minutes.
-
SQL server management studio must then be installed following successful installation of the SQL server. The program can be downloaded and installed from the Microsoft websiteusing the SQL server installation program (a server resart may be necessary).
