Installation of esweb on a server with installed Microsoft IIS web server is described below.
esweb for esoffice / esweb for eserp
There are small differences between the installation of esweb for esoffice and eserp. These differences are clearly marked in the description below.
Requirements
-
Microsoft IIS server (already installed and configured)
Also see
-
Installation Microsoft Web Server IIS
Please note the following requirements for use of a Microsoft SQL server with esoffice / eserp:
-
-
Completed installation / configuration of esoffice / eserp
-
Installation and setup of the esBusiness server services.
Several esweb instances
The instructions below describe the installation of one esweb instance.
If more than one instance of esweb is to be used (for example: productive and test environments) then please note the instructions on Installing parallel esweb instances.
If you have an esweb for esoffice below version 11.0.20.0 in use (for example version 10.95.xx) you must uninstall the older esweb version before an update. You can then install the latest esweb version 11.0.20.0 or later.
esweb installation
-
Run the esweb installation program esweb-xx.x.x.xx as an administrator.

xx.x.xx.xx = Installation program version number
-
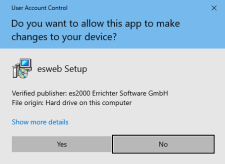
If Windows user account manager is activated, a message may be displayed.
Click on the Yes button to continue.
-
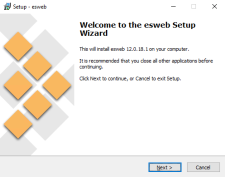
The esweb setup wizard starts. Click on the Next button to continue.
-
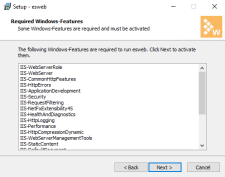
The setup wizard will first check if Microsoft IIS is installed with all the necessary components / features. If the check reveals that components / features are missing, these will be listed and can be activated by the installation program. Click on the Next button to do this.
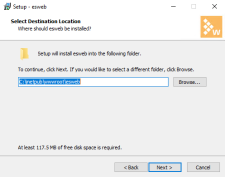
If the installation requirements are met, a suggested installation directory will be shown.
You can use the Search button to select a different folder.
This folder should be in the IIS directory (default: C:\inetpub\wwwroot). Use of the suggested directory is recommended.
Click on the Next button to continue to the next step.
-
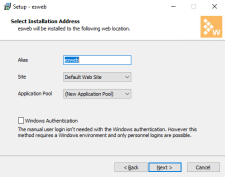
To install esweb on IIS, an Alias, a Site, and an Application pool are now suggested.
Alias
The Alias (default = esweb) indicates how a user can call up the esweb website (for example www.mycompany.com/esweb).
Site
If there are already several websites set up on IIS, you can use Site to select the one that you want. By default only the Default Website can be selected and is already set.
The specified settings can be changed at a later date after the installation if you have the apppropriate specialist knowledge.
Application pool
A new Application pool is created by default for the esweb.
Windows authentication (esoffice only)
You can activate Windows authentication here for an esweb installation for esoffice.
User login with personnel number and password is no longer required with Windows authentication. This method is only useful in local Windows networks, and only employees will be able to log in.
This log in method will no longer be supported in the long term.
These settings can be changed at a later date after the installation if you have the apppropriate specialist knowledge.
Click on the Next button to continue to the next step.
-
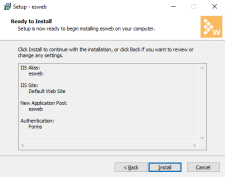
The settings made using the setup wizard will be displayed again for you to check them.
Check that the settings you made are correct and then click on the Install button.
-
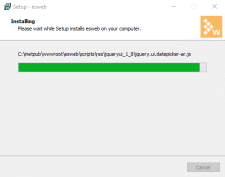
Installation of all the required files can take some time.
-
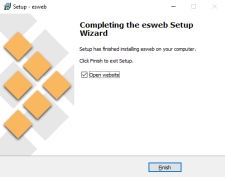
The following dialog is displayed when installation has completed successfully.
You can now open the esweb website for initial configuration. To do this, activate the Open website option and click on the Complete button.
-
The newly set up esweb environment can be opened automatically in a standard web browser on completion of the installation.
If this does not work, you can use a suitable browser to open esweb manually using the URL
 The URL (Uniform Resource Locator) is the address of an individual web page. It can be entered directly in the address line of a web browser.
The URL is not the same as the domain. The domain is only a part of the URL. https://localhost/esweb (as long as you did not change the alias esweb during the installation process).
The URL (Uniform Resource Locator) is the address of an individual web page. It can be entered directly in the address line of a web browser.
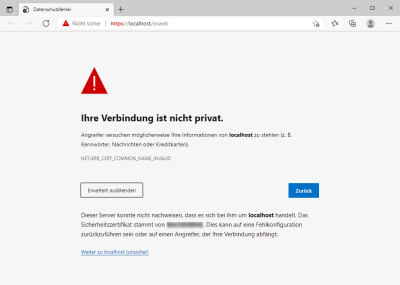
The URL is not the same as the domain. The domain is only a part of the URL. https://localhost/esweb (as long as you did not change the alias esweb during the installation process).The website https://localhost/esweb will only open if a certificate for HTTPS call up has been recorded. Otherwise, the online help will open and display information about embedding a certificate and activating HTTPS.
Also see Activating HTTPS on IIS.
Message indicating missing or anomalous certificate
-
As long as the website could be successfully opened automatically or manually, you can proceed with the further set up of esweb.
Also see esweb standard setup
