esDBImage to png using Transfer
This document describes how to convert the esDBImage data type from your esoffice database into a universal *.PNG image format file.
The original data remains unchanged by this process. The converted image data are stored in extra tables and can be used from there, for example in reports.
To use this new feature, esdbm and the ESTransfer.ESO.dll library are required
The ESTransfer.ESO.dll library must be located in the esdbm program directory. This is normally ensured by the esdbm installation routine.
Also see esdbm installation
Understanding the function
The photographs of the employees in the personnel master data are stored in esDBImage format inthe esoffice database.
To produce a personnel data report (Microsoft Reports) using these photographs, for example, access to the photographs stored in the database is required.
However, MS Reports cannot access images or graphics in esDBImage format, so they must be converted into a usable graphics format.
The image files of the personnel photographs are stored in the PERSBILD table. A databse table for saving the images in PNG format is required for the conversion process. You can freely assign the name of this table and the associated fields as well as the number of fields.
Example creation of an MSSQL table
es2000 does not make any recommendation regarding the suitability of the following information. Errors and exceptions are excluded and no responsibility is accepted for the information provided. The statements are simply descriptions and do not guarantee the consistency of the products. The information may also in part be regarded as an attempt to provide you with assistance for a task even if the product was not actually intended for this special purpose.
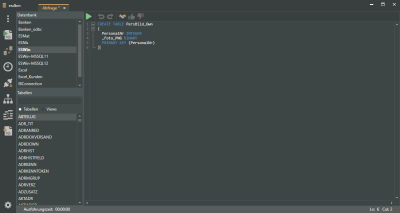
CREATE TABLE PersBild_Own
(
  PersonalNr INTEGER
  ,Foto_PNG BINARY
  PRIMARY KEY (PersonalNr)
)
After executing the SQL command in esdbm (SQL query) or Microsoft SQL Management Studio, you can use the newly created table for converting the image files.
Create transfer
The image files are transferred using the Transfer function in esdbm. The image data is converted to PNG format at the same time.
Create transfer
-
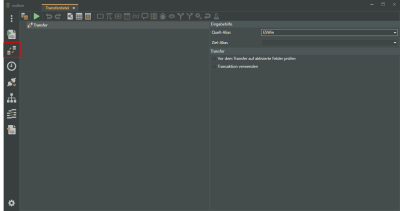
To start a new transfer, click on the icon button
 Create transfer in the esdbm program window.
A new tab, Transfer file, opens. The transfer file only contains the main node Transfer.
-
The Source alias and Target alias are specified in the Entry help area.
By default the alias ESWin is entered as the Source alias in the Entry help area. You can also select a different alias.
The database aliases shown are read out from the dbxconnections.ini file in the esoffice para directory. You can view / edit the database connections under Connection settings.
-
The same database alias must be specified for the Source alias and the Target alias for a transfer of the image files within the same database.
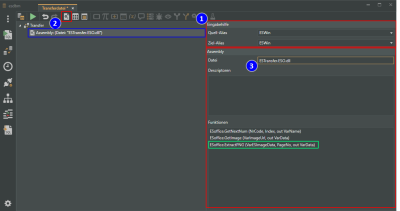
Select the database alias (1) for both that you also used for creating the new table, for example ESWin.
Log in data
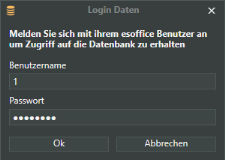
An esoffice user login is required when a module is opened or a function that acesses an esoffice database is executed.
The user requires 110 - Basic settings authorization.
If you have successfully logged in to an esoffice database (alias) in esdbm, your log in data will not be requested again when you access the database alias again.
-
Add an Assembly reference to the Transfer by clicking on the
 icon button (2).
 -
Enter ESTransfer.ESO.dll in the File field in the Assembly area (3).
The specified DLL file must be located in the esdbm program directory.
After you have entered the file name, the available transfer functions for the Assembly will be displayed in the Functions area.
The ESoffice.ExtractPNG function is used to convert the image files.
-
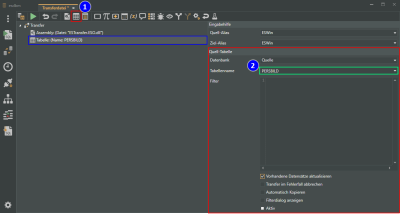
Add a node Table using the
 icon button (1).
Set the selection to Source under Database in the Source data area.
Select the PERSBILD table in the Table name field (2).
-
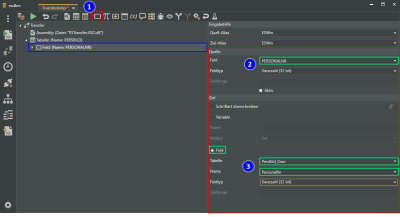
Add a Field type transfer node using the
 icon button (1).
Assign the Personnel no field to it in the Source area (2).
In the Target area, activate the Field option and then select the Persbild_own table and the Peronnelno field under Name (3).
The other properties are filled out automatically.
-
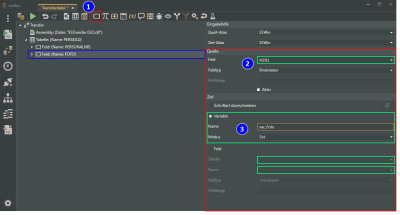
The personnel image must first be loaded into a variable for processing.
Add a Field type transfer node using the
 icon button (1).
Assign the Photo field to it in the Source area (2).
In the Target area, activate the Variable option and assign a name to the Variable (for example: var_Photo).
Set the Mode to Set, which means that the variable will be filled afresh, any previous content will not be transferred.
-
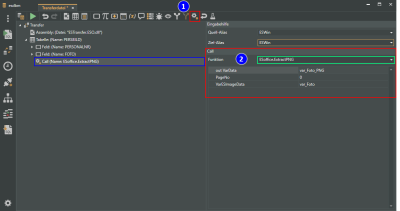
The next step in the transfer converts the ESDBImage in the variable to a PNG image file.
For this, add the Call function using the
 icon button (1).
In the Call area, select the Esoffice.ExtractPNG function and set the function parameters.
Enter the variable name from the previous step for the parameter VarESImageData. Enter the value 0 for the PageNo. Enter a new variable name For example: var_Photo_PNG) in out VarData where the changed image data will be loaded (2).
-
The last step saves the converted image files in the newly created database.
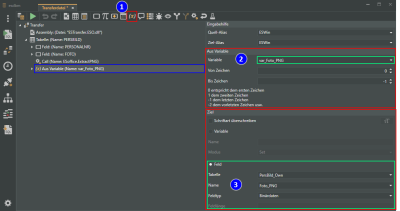
For this, add the From variable function using the
 icon button (1).
In the From variable area, select the newly created variable (var_Photo_PNG) from the last step in the Variable field (2).
In the Target area, activate the Field option and then select the Persbild_own table and the Photo_PNG field under Name (3).
The other properties are filled out automatically.
-
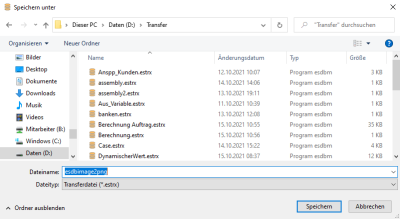
Save the transfer file for later use under a path / file name of your choice using the
 File menu -> Save as command.
 -
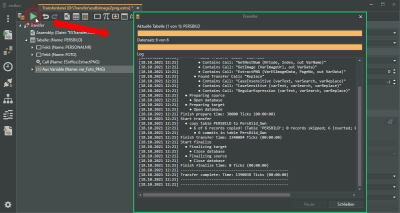
Start the transfer by clicking the button.
A summary will be shown during and on completion of the transfer.
This will also indicate any errors that may have occurred.
The log is displayed when the transfer is complete.
The transfer can be executed automatically using the Transfer Schedule.
XML transfer file
<?xml version="1.0" encoding="utf-8"?>
<transfer version="1.2" verbose="false">
  <assembly filename="ESTransfer.ESO.dll" />
  <table checkupdate="true" stoponerror="false" name="PERSBILD">
    <field name="PERSONALNR" typ="I" action="C">
      <target table="PersBild_Own" field="PersonalNr" typ="I" />
    </field>
    <field name="FOTO" typ="B" action="C">
      <setvar name="var_Foto" />
    </field>
    <call name="ESoffice.ExtractPNG">
      <parameter id="VarESImageData" value="var_Foto" />
      <parameter id="PageNo" value="0" />
      <parameter id="out VarData" value="var_Foto_PNG" />
    </call>
    <fromvar name="var_Foto_PNG">
      <target table="PersBild_Own" field="Foto_PNG" typ="B" />
    </fromvar>
  </table>
</transfer>