SQL query
What is a query?
As in other database systems, queries are used in SQL![]() Structured Query Language
SQL is a database language used to define, query, and manipulate data in relational databases. SQ L is standardized by ANSI and ISO ans supported by practically all current database systems. to extract data from existing database tables, and to calculate values, etc. This often involves accessing a part of the existing data and displaying it in the desired form or processing it further.
Structured Query Language
SQL is a database language used to define, query, and manipulate data in relational databases. SQ L is standardized by ANSI and ISO ans supported by practically all current database systems. to extract data from existing database tables, and to calculate values, etc. This often involves accessing a part of the existing data and displaying it in the desired form or processing it further.
The structure of SQL queries for corresponding results cannot be described here.
You can find information about this on the Internet or in specialist publications.
es2000 does not make any recommendation regarding the suitability of the following information. Errors and exceptions are excluded and no responsibility is accepted for the information provided. The statements are simply descriptions and do not guarantee the consistency of the products. The information may also in part be regarded as an attempt to provide you with assistance for a task even if the product was not actually intended for this special purpose.
New SQL query
To create a new SQL query, click on ![]() New query in the esdbm program window.
New query in the esdbm program window.
A new tab, Query, opens.
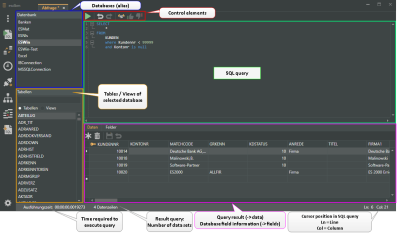
By default, the alias ESWin is selected under Databases and the corresponding database tables are listed.
The following information is displayed on this tab.
The following information is displayed on this page.
'Database' area
All the aliases defined and recorded for the corresponding databases are shown here. You can open a database by double clicking on the corresponding alias.
The databases shown are read out from the dbxconnections.ini file in the esoffice para directory.
You can view / edit the database connections under Connection settings.
'Tables' area
The tables for the currently selected database alias are listed here by default.
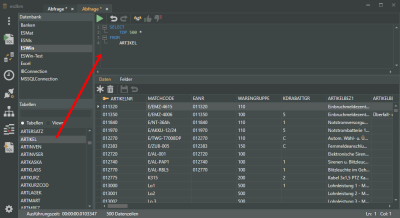
Double click on a table name to open the table. An SQL query is created, the database is opened, and the query result is displayed.
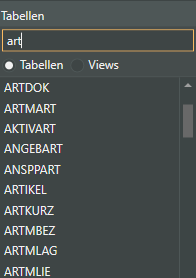
Find table
You can search within the tables using the Search field above the table list. The table list will show only the tables containing the search term that you entered.
Views
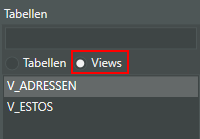
As well as the tables, you can also list the database Views for the selected database.
'SQL query' area
The SQL queries are defined in this area.
If you open a table by double clicking on it, an SQL query for this table will be created by default and the data sets of this table will be displayed on the Data sub tab. The first query is thus already in the entry field.
Not all of the data sets are displayed when a table is opened.
For some tables containing a lot of data, only 500 data sets are initially shown (SELECT TOP 500 *).

To show all the data sets, delete the TOP 500 adjunct in the SQL command.

Auxiliary functions
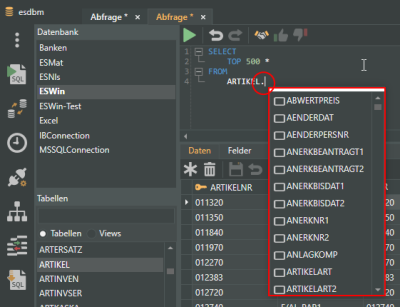
Some assistance is included for the creation of queries. When a meaningful period (.) is entered, for example, a list of all the available fields will be displayed automatically. You can then select the field that you want or are looking for.
List of available fields
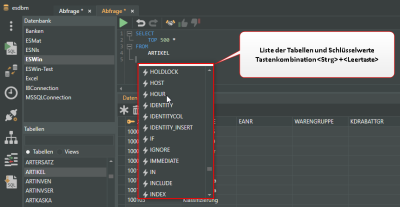
If you press the keyboard shortcut Ctrl + Space when entering a query, a list of all the tables and key words opens. You can select what you are looking for from here, too.
List of tables and key words
Icon meanings
![]() Field
Field
![]() View
View
![]() Table
Table
![]() SQL function / Key word
SQL function / Key word
The Edit menu for the queries is above the entry field.
Control elements
Some control elements are provided for execution of the queries.
![]() Run query
Run query
You can use this button or press F9 to run the new query that you have created. The data resulting from the query is displayed on the Table tab.
You can also mark part of the query and run this part by pressing the F10 key.
![]() Previous statement
Previous statement
If you change the query after it is run, you can use the ![]() Previous statement button to return to the previous query.
Previous statement button to return to the previous query.
The button is only active after a query has been run.
Keyboard shortcut: Alt + ← left arrow
![]() Next statement
Next statement
if you used the ![]() Previous statement button to go back to a previous query, you can use the
Previous statement button to go back to a previous query, you can use the ![]() Next statement button to go forward to the next query again.
Next statement button to go forward to the next query again.
Keyboard shortcut: Alt + → right arrow
![]() Start transaction
Start transaction
You can start a database transaction by clicking this button or pressing F6. A Transaction is a number of database changes that are / must be performed together.
Also see Transaction
![]() Commit
Commit
You can transfer a query run in transaction mode to the database using the ![]() Commit button or by pressing F7.
Commit button or by pressing F7.
![]() Rollback
Rollback
You can undo a query performed in transaction mode using the ![]() Rollback button or by pressing F8.
Rollback button or by pressing F8.
Context menu
There are also functions in the SQL query context menu that is opened with a right click.
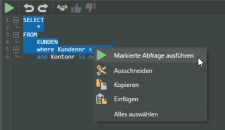
![]() Run selected query
Run selected query
You can also run only a part of an SQL query.
Left click Cand hold down the mouse button to mark the desired portion of the query. The selected text is highlighted in color.
Select the Execute selected query command in the context menu.
Keyboard shortcut: F10.
![]() Cut
Cut
Removes the selected portion of an SQL query and places it on the clipboard. The cut section can be inserted in a different place again using the Paste function.
Keyboard shortcut: Strg + X
![]() Copy
Copy
Copies the selected part of an SQL query to the clipboard. The copied section can be inserted at a different point using Paste.
Keyboard shortcut: Strg + C
![]() Insert
Insert
Pastes the contents of the clipboard into the query.
Keyboard shortcut: Strg + V
Select all
Selects the complete text of the SQL query
Keyboard shortcut: Strg + A
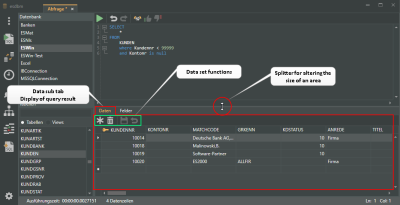
'Data' sub tab
The result of the SQL query is shown on the Data sub tab.
Query values are displayed on this tab. The current line is indicated by a small arrow ![]() in the first column. There is also always an empty line at the end of the displayed content.
in the first column. There is also always an empty line at the end of the displayed content.
The following functions are available here:
The functions listed here have a direct effect on the contents of your database.
For example, all the data that you change data will also appear inthe esoffice program.
If you delete or overwrite data without saving it first, these actions cannot be undone.
![]() New data set
New data set
Enables the last entry line. This is indicated by the ![]() icon at the beginning of the line.
icon at the beginning of the line.
![]() Delete
Delete
Deletes the current data set. A security prompt will be displayed before the data is actually deleted.
![]() Save
Save
Saves any changes that you have made in the database.
![]() Discard
Discard
Undoes all the unsaved changes you have made.
Save query
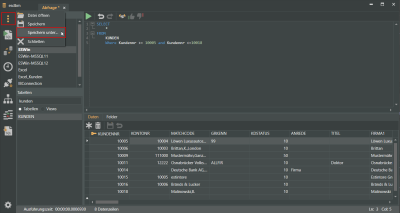
You can save an SQL query as a *.SQL file for use later
-
Create an SQL query.
-
Select the Save as command in the
 File menu.
 -
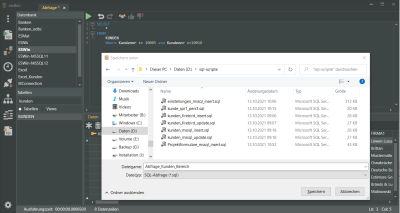
You can specify a path and a file name in the file selection window.
Select SQL query (*.sql) for the File type.
The query is saved as a text file with the suffix *.sql.
You can open files in *.sql format (SQL queries) using the
 Open file command in the
  File menu.
The SQL queries module opens when you open a *.sql file.
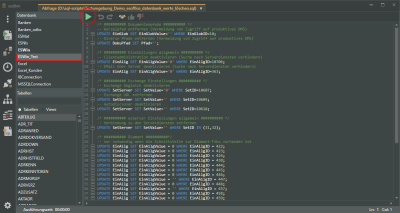
Load SQL script
If you already have an SQL script saved as a file, you can open it and run it.
-
It may be necessary to run database update scripts when making an esoffice update.
-
When setting up a test environment
Also see Set up esoffice test environment
-
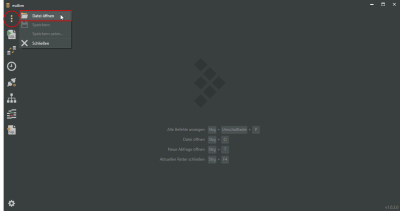
Open esdbm and select
 Open file in the
  File menu.
 -
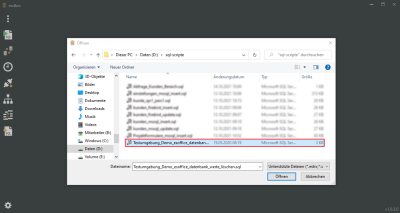
Now select the SQL script file in the file selection window and click on the Open button.
-
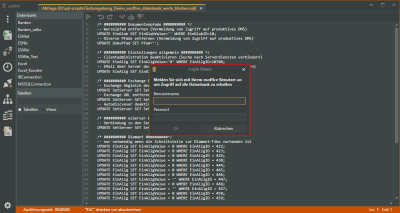
The SQL query module opens in a separate tab and the SQL script loads.
Log in data
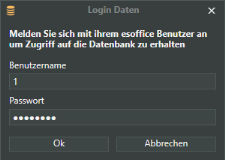
An esoffice user login is required when a module is opened or a function that acesses an esoffice database is executed.
The user requires 110 - Basic settings authorization.
If you have successfully logged in to an esoffice database (alias) in esdbm, your log in data will not be requested again when you access the database alias again.
-
In the Databases list, select the Database alias that the script is to be run on.
You can make adjustments to the script before it is run. Detailed knowledge of esoffice databases and SQL is required for this.
-
Start execution of the SQL script by clicking the
 Execute query button.
 -
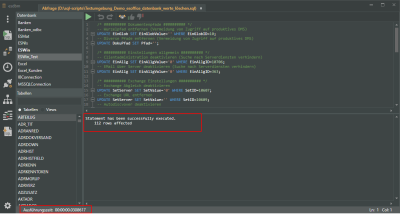
A message and the execution time are displayed when the SQL script has run.
Save query result
To be able to use the result of a query in another application, for example Microsoft Excel, you can save the query result in various file formats
To do this, use the Save as function in the ![]() File menu. You can save the query result in the following file formats:
File menu. You can save the query result in the following file formats:
-
Excel table (*.xlsx)
-
MS XML file (no schema) (*.xml)
-
CSV file (*.csv)
-
es2000 CSV file (*.escsv)
'Fields' sub tab
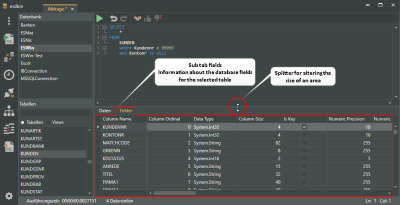
Information about each table field regarding its size, name, data type, etc., is displayed on the Fields sub tab.
In the IsKey column, the particular primary key fields in the individual tables are indicated by an activated option in the IsKey column.
If a data set cannot be clearly identified from a field, the primary key (index) may consist of a combination of several fields.
Splitter
Splitters are provided between areas. These can be used to change the size of the areas as desired.
Status line
You will also find statistical information in the SQL query status line about the execution time of the query, number of data sets displayed, and the cursor position in the query area.
List functions
The following functions for lists are found in the Data and Fields sub tabs:
The values in a column can be sorted in ascending or descending order by clicking on the table column header.
Context menu
Right click on the column header. Further sort functions are provided in the context menu.
Sort ascending / Sort descending
A further way to sort the data in the list view is to right click on the column header and select Sort ascending / Sort descending in the context menu.
Remove sorting
Removes all the sorting that has been done.
Multiple column sort
You can select more than one column for sorting by selecting them with the Shift key pressed.
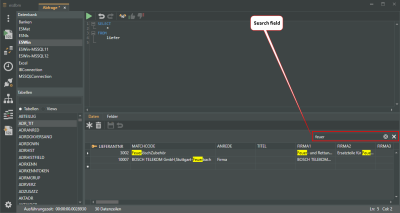
You can also start a full text search within the displayed information.
Right click on the column header and select Show search field from the context menu.
A search field is displayed above the column headers. Type the search term in the Search field and press Enter to confirm.
All the locations found will be highlighted in color in the list.
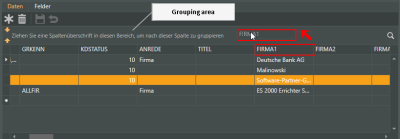
To group the data sets according to identical data sets in a column, do the following:
Method 1
Left click and drag the desired column into the Grouping area.
If the Grouping area is not displayed, right click on the list header line and select Show grouping field from the context menu.
Method 2
Right click on the desired column header and select Group by this column from the context menu.
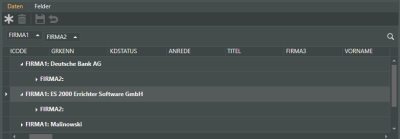
Both methods result in the data being grouped according to the selected criterion and displayed.
The lists are always opened without grouping.
Expand grouping
You can expand grouping by further subdividing already grouped data according to additional criteria. To do this, drag further column headers into the Grouping area or use the Group by this column command in the context menu.
Ungroup
To ungroup, right click in the Grouping area and select the Ungroup command in the context menu.
Move columns / Change column order
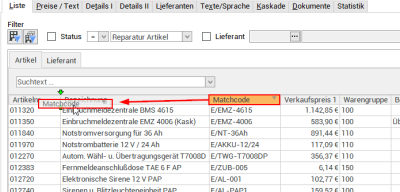
Each user can set the column order individually. To move a column, click on the column and hold down the left mouse button, drag it to the desired position between two columns and release the mouse button (drag and drop).
Suitable locations for inserting a column are marked with two green arrows.
Column editor
You can include hidden columns in the list / table view again using this function. An additional window (Adjust) that shows all the hidden columns is displayed for this.
Click on the required column and hold down the left mouse button, drag it to the desired position between two columns and release the mouse button (drag and drop). Suitable locations for inserting a column are marked with two green arrows. The column is then inserted at the position under the mouse pointer.
Optimum width
Adjusts the column width to automatically match the contents. Right click on the column header and select Optimum width from the context menu.
Use the Save layout function to permanently store the changed column width.
If you do not save the Layout after changing the column width, the column width will be reset when you restart the module.
Optimum width (all columns)
Adjusts the column width to automatically match the contents for all columns. Right click on the column header and select Optimum width (all columns) from the context menu.
Use the Save layout function to permanently store the changed column width.
If you do not save the Layout after changing the column width, the column width will be reset when you restart the module.
Transaction
The functions listed here affect the contents of the database.
For example, all the data that you change will also appear in the esoffice program.
If you delete or overwrite data without saving it first, these actions cannot be undone.
A Transaction is a number of database changes that are / must be performed together.
Thus, for example, booking a sum of money (as a transaction) is characterized by two database operations: Withdrawal of the money from account A and Deposit of the money in account B.
If complete processing of the elementary database operations in a transaction cannot be completed (for example because of an error), all the changes made to the data must be reset to the original state.
The process that resets all the changes mande in a transaction is called Rollback. Commit is the term that signifies execution of a Transaction. This applies any changes that have been made to the data.
Transactions are one way of ensuring the consistency of the data. For example, in double entry bookkeeping, the prevention of invalid partial bookings ensures that the accounts balance.
 Start transaction
You can start a database transaction by clicking the ![]() Start transaction button or pressing F6. A Transaction is a number of database changes that are / must be performed together.
Start transaction button or pressing F6. A Transaction is a number of database changes that are / must be performed together.
Define your SQL query and then click on the ![]() Execute query button. The result of the query is displayed on the Data sub tab.
Execute query button. The result of the query is displayed on the Data sub tab.
 Commit
This button is only active when a transaction has been started.
You can transfer a query run in transaction mode to the database using the ![]() Commit button or by pressing F7.
Commit button or by pressing F7.
 Rollback
This button is only active when a transaction has been started.
You can undo a query performed in transaction mode using the ![]() Rollback button or by pressing F8.
Rollback button or by pressing F8.
Keyboard shortcuts
The following keyboard shortcuts / key combinations are available in the SQL queries module.
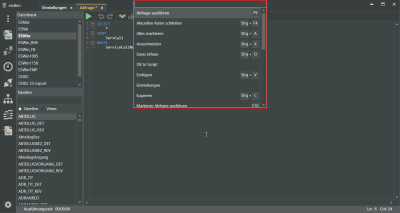
Show all commands
Ctrl + Shift + P
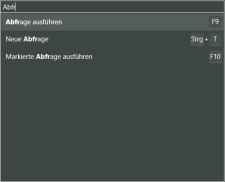
Displays all the commands available for the opened module including key combinations in a window.
You can also search for commands in the command window.
Open file
Ctrl + O
Open new query
Ctrl + T
Close current tab
Ctrl + F4
Select all
Ctrl + A
Cut
Ctrl + X
Insert
Ctrl + V
Copy
Ctrl + C
Run query
F9
Run selected query
F10
Format SQL
Alt + Shift + F
Previous statement
Alt + ← left arrow
Available when at least one SQL query has been performed.
Next statement
Alt + right arrow
Available when the Previous statement function has been executed.
Open new query
Ctrl + T
Search
Ctrl + F
Save
Ctrl + S
Save as
Ctrl + Shift + S
Start transaction
F6
Commit
F7
Available when a transaction is started
Rollback
F8
Available when a transaction is started
