esweb standard setup
Standard setup of esweb must be preceded by the following actions:
-
Installation of esweb
Open esweb
You can open esweb manually after installation is complete using the URL![]() The URL (Uniform Resource Locator) is the address of an individual web page. It can be entered directly in the address line of a web browser.
The URL is not the same as the domain. The domain is only a part of the URL. https://localhost/esweb (as long as you did not change the alias esweb during the installation process).
The URL (Uniform Resource Locator) is the address of an individual web page. It can be entered directly in the address line of a web browser.
The URL is not the same as the domain. The domain is only a part of the URL. https://localhost/esweb (as long as you did not change the alias esweb during the installation process).
It can take some time to open esweb for the first time as the application is prepared for the corresponding web server.
Set up esweb
Set Windows perrmissions
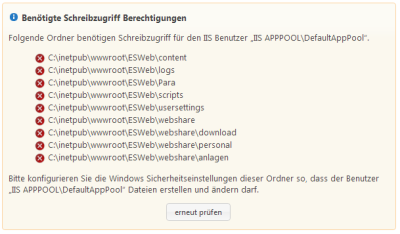
If the Windows authorizations were not set by the esweb installation program, the following message is diplayed:
If one or more of the paths listed are marked with ![]() , it will be necessary to manually adjust the Windows permissions for the corresponding folders.
, it will be necessary to manually adjust the Windows permissions for the corresponding folders.
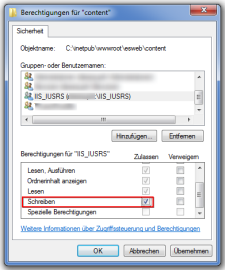
For this, the administrator should permit Write authorization to the IIS_IUSRS group (whose members include the user DefaultAppPool named in the screenshot) for the corresponding folders under Properties | Security.
It should also be considered that this user should not have these rights (or even full access) to the entire esweb folder, but only to the listed subfolders.
Example of folder content
After the authorizations for the dfolder have been adjusted accordingly, the Check again button can be used to continue.
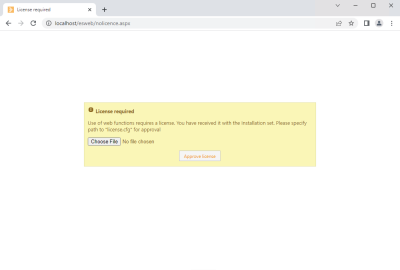
Select licence file
Next, you must select a licence file for esweb and check the validity of the licence.
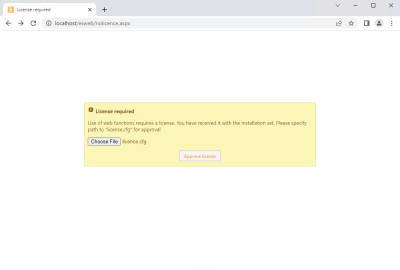
The licence file licence.cfg that is stored in the Para folder (default = /esoffice/Para) in the esoffice installation can be selected using the Select file button.
Communication for the individual esoffice / eserp modules requires that the same licence file (licence.cfg) is used in the following places:
-
esoffice / eserp
-
esBusiness Server
-
esweb
The validity of the selected licence file can be verified again by using the Check licence button.
When the licence check is successfully completed you can proceed to the next step.
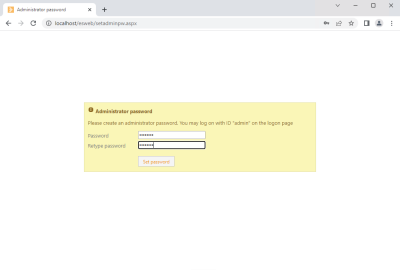
Assign administrator password.
Next you will be asked to record an administrator password.
Assign a secure password of up to 8 characters for adminitrative access to esweb.
Please make a note of this password and keep it in a secure place.
The admin user can then access the esweb application even if there are no user passwords recorded in the application itself. This is necessary for the initial setting up of the application as well as in the event that all esweb users are locked out due to incorrect operation.
Once you have entered the administrator password and confirmed it with Set password, the admin interface for esweb opens and the major part of the installation is complete.
If any one of the three dialogs mentioned aboveis not displayed, the corresponding settings will have been made automatically by the installation.
The next step is to specify the connection to your esoffice database.
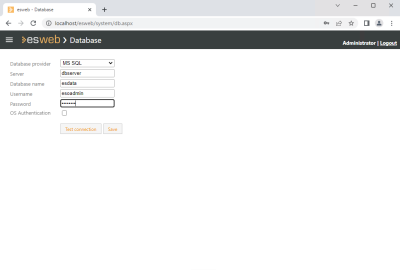
Connection to database
The next step is to specify the connection to your esoffice / eserp database.
You can transfer the data for the database connection from the esoffice / eserp installation. These data can be displayed in esdbm in the Connection settings, for example.
Database provider
Select MS SQL or Firebird depending on the SQL database server you have installed.
Different fields will be provided for the database connection depending on the selected database provider.
Server (MSSQL / Firebird)
Name or IP address of the server where the SQL server is installed.
Make sure that the SQL server is reachable from the web server by means of appropriate firewall rules / port sharing.
Database name (MSSQL)
Name of database for esoffice / eserp. The default name is esdata.
Database file (Firebird)
Path and file name of the database file on the database server.
User name (MSSQL / Firebird)
Enter the name of the database user here.
Password (MSSQL / Firebird)
Record the password for the database user here.
Role (Firebird)
If a role has been set up for the Firebird SQL server, enter it here.
Character set (Firebird)
Enter the character set used for the Firebird database here. The default is WIN1252.
SQL dialect (Firebird)
Select the dialect for the Firebird SQL database.
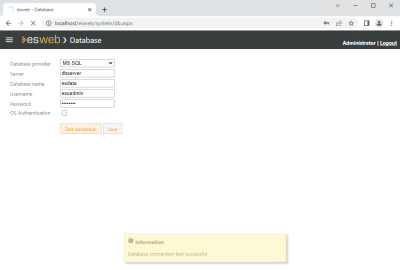
Test connection
When you have completed all the information for the databas, check the database connection using the Test connection button.
A corresponding message is displayed if the connection can be made to the database.
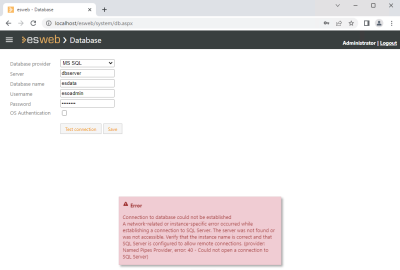
If the connection is not successful, an error message indicating the possible cause of the error will be displayed.
If there is an error, check that the information entered for the database is correct and that the database server is reachable (firewall rules / port sharing).
Diagnostics
When all the database settings have been made, please check the sub menus.
-
esweb | System | Diagnosis
-
esweb | System | Services
Create user
It is additionally recommended that a further user for the web interface is created directly.
This is done under esweb | Settings | User management.
