Dashboard
The dashboard opens as the homepage following login to esweb as an employee. The information shown on the dashboard can be arranged individually using predefined widgets.
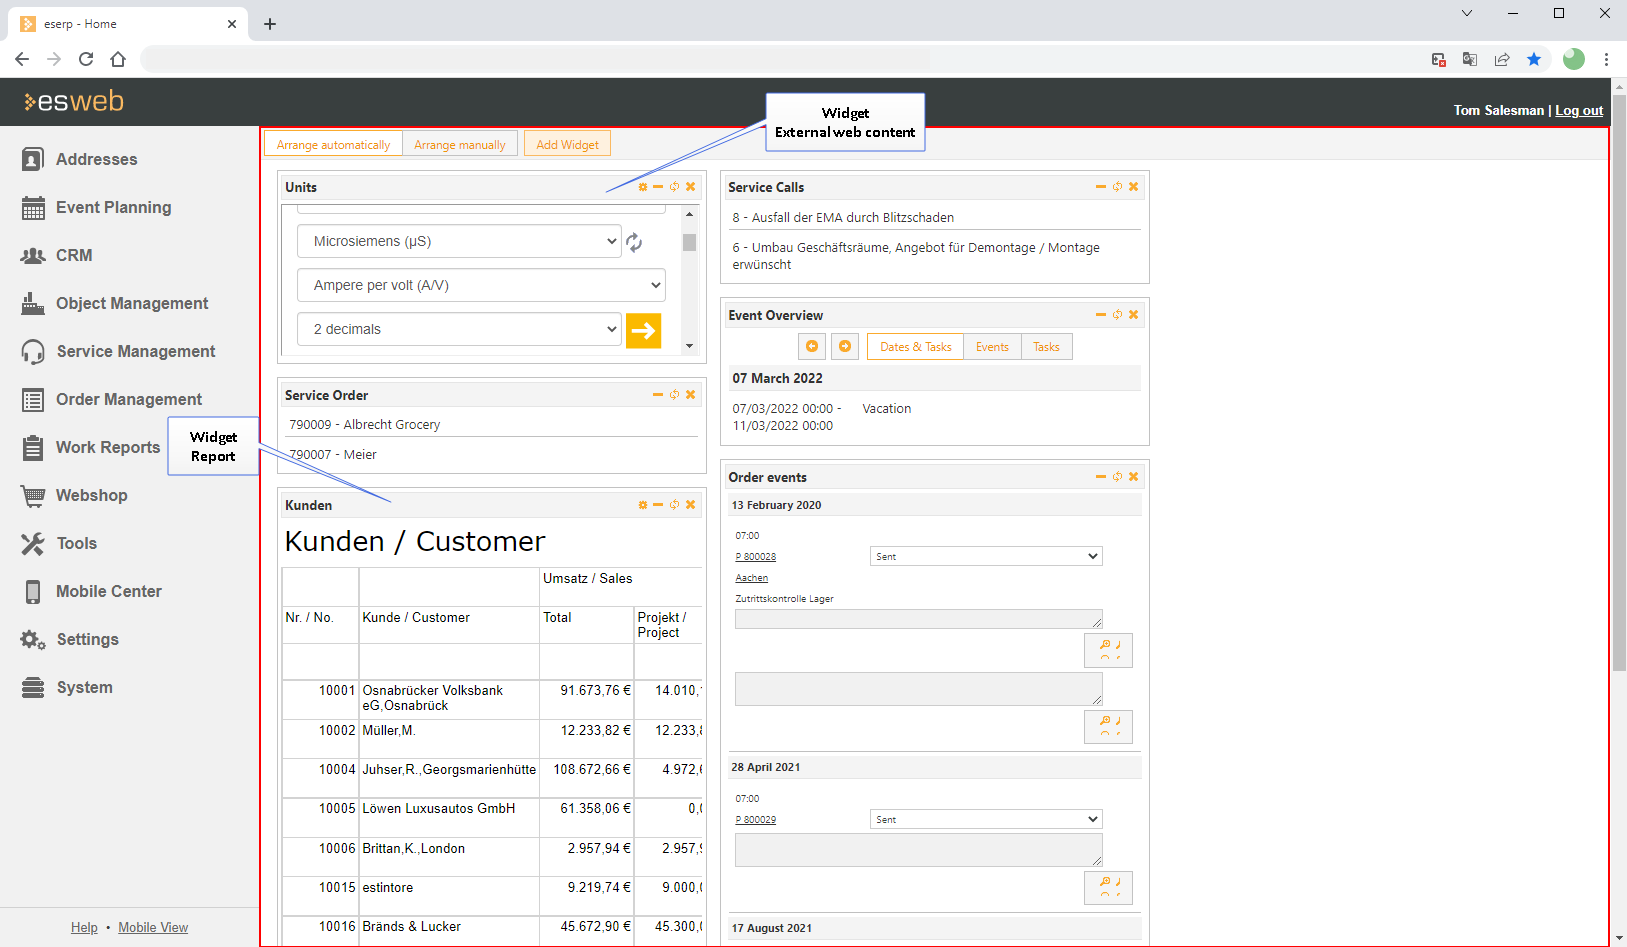
esweb start page
When you start esweb, your start page could look something like the image shown above.
This is the personalized esweb start page of the logged in user.
When esweb is opened for the first time, an empty dashboard is displayed. Widgets must be added in order to display information (appointments, service orders, reports, etc.).
The individual components of the user interface are referred to here as widgets.
Add widget
Click on the Add widget button. A selection window opens.
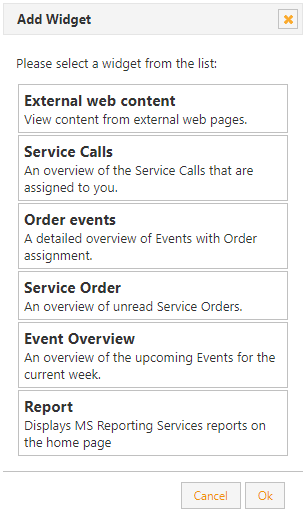
Component selection window
Select a widget by clicking on it and then click on OK.
The widget is displayed on the dashboard. Each component that is added can be moved anywhere on the screen, also see Arranging widgets.
The following widgets are available depending on the authorizations held by the logged in user:
External web content
You can display the contents of an external website using this widget.
After you have added the External web content widget, it must be configured using the  button. You can specify the Title and the Address (URL
![]() The URL (Uniform Resource Locator) is the address of an individual web page. It can be entered directly in the address line of a web browser.
The URL is not the same as the domain. The domain is only a part of the URL.) of the external website.
The URL (Uniform Resource Locator) is the address of an individual web page. It can be entered directly in the address line of a web browser.
The URL is not the same as the domain. The domain is only a part of the URL.) of the external website.
Service calls
Service calls from the helpdesk that are assigned to the logged in user can be displayed using this widget.
Order appointments
Dates or appointments related to orders for the logged in user can be displayed using this widget.
You can use the widget to open the individual orders, view the message, set the order status, and display the system information.
The future period for which order appointments are to be displayed is set under Settings | General | CAS using the Preview order appointments setting.
Service orders
Unread service orders for the logged in user can be displayed in this widget. The particular service order can be opened for processing by means of the service order number.
Appointment overview
All the appointments and tasks in the current week for the logged in user are displayed. The week to be displayed canbe altered using the arrow buttons.
Report
This widget can be used to display on the start page Microsoft Reports that have been registered for the Dashboard program entry point in esoffice.
Also see Report - Registration.
To display a report, first click on the report selection dialog button ().
The dialog opens.
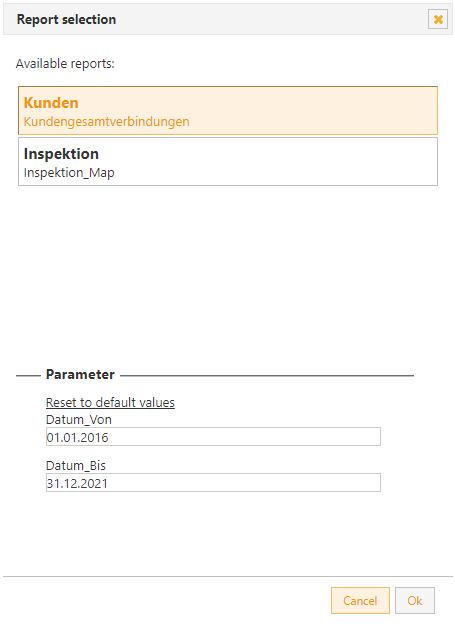
Report selection dialog
All the registered reports from eserp are displayed under Available reports.
The Parameters area is additionally shown at the bottom of this window. Various display parameters are listed here depending on the report. Select a report to display the parameters.
To do this, simply click on one of the reports in the list.
The selected report will be highlighted in color and the Parameters area filled out.
A Microsoft SQL Server with Microsoft Reporting Services configured on it is required for the use of Microsoft Reports.
Also see Microsoft Reporting Services
Arranging widgets
Automatic widget arrangement
Click on the Arrange automatically button. The button is then displayed on a white background. The automatic arrangement distributes the individual components on the screen according to their size and the available space.
Manual widget arrangement
Manual arrangement allows you to determine the size and position of the components on the screen.
The default arrangement for manual arrangement is usually all components shown at the top left.
The component name and various buttons are displayed in the header of the widget you added.
These have the following meanings:
Setting dialog / report selection dialog
This button opens the setting dialog for the widget. For a report widget, this button opens the report selection dialog, where you can also adjust the report parameters.
 Minimize component / widget
This button minimizes an existing component.
 Maximize component / widget
This button restores a minimized component.
 Refresh
This button reloads the corresponding data and the display is updated.
 Remove component / widget
This button removes the existing component (widget) from the dashboard again.