Customizing (edit layout)
The optional esweb Customizing module allows you to adjust the forms in esweb, for example by hiding fields or moving them to a different position.
A license for 3010250 - esweb Customizing is required for the customizing functions.
The basic layout of esweb can be customized using user defined CSS![]() Cascading Style Sheets is a stylesheet language for electronic documents and is one of the core languages of the worldwide web together with HTML and JavaScript. CSS is used to create layout instructions that are used above all with the markup languages HTML and XML (for example for SVG). files; also see esweb | Settings | Layout.
Cascading Style Sheets is a stylesheet language for electronic documents and is one of the core languages of the worldwide web together with HTML and JavaScript. CSS is used to create layout instructions that are used above all with the markup languages HTML and XML (for example for SVG). files; also see esweb | Settings | Layout.
Customize esweb form
-
Open esweb.
-
After logging in, open the form that you want to customize.
-
Click on the
 Edit layout button in the toolbar.
 -
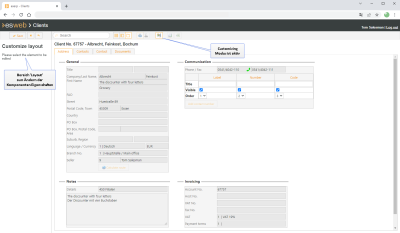
The form is set to Customizing mode and the Layout area is shown on the left hand side. You can now make changes to the form.
-
There will be no properties shown in the Layout area when the function opens because a component has not been selected yet.
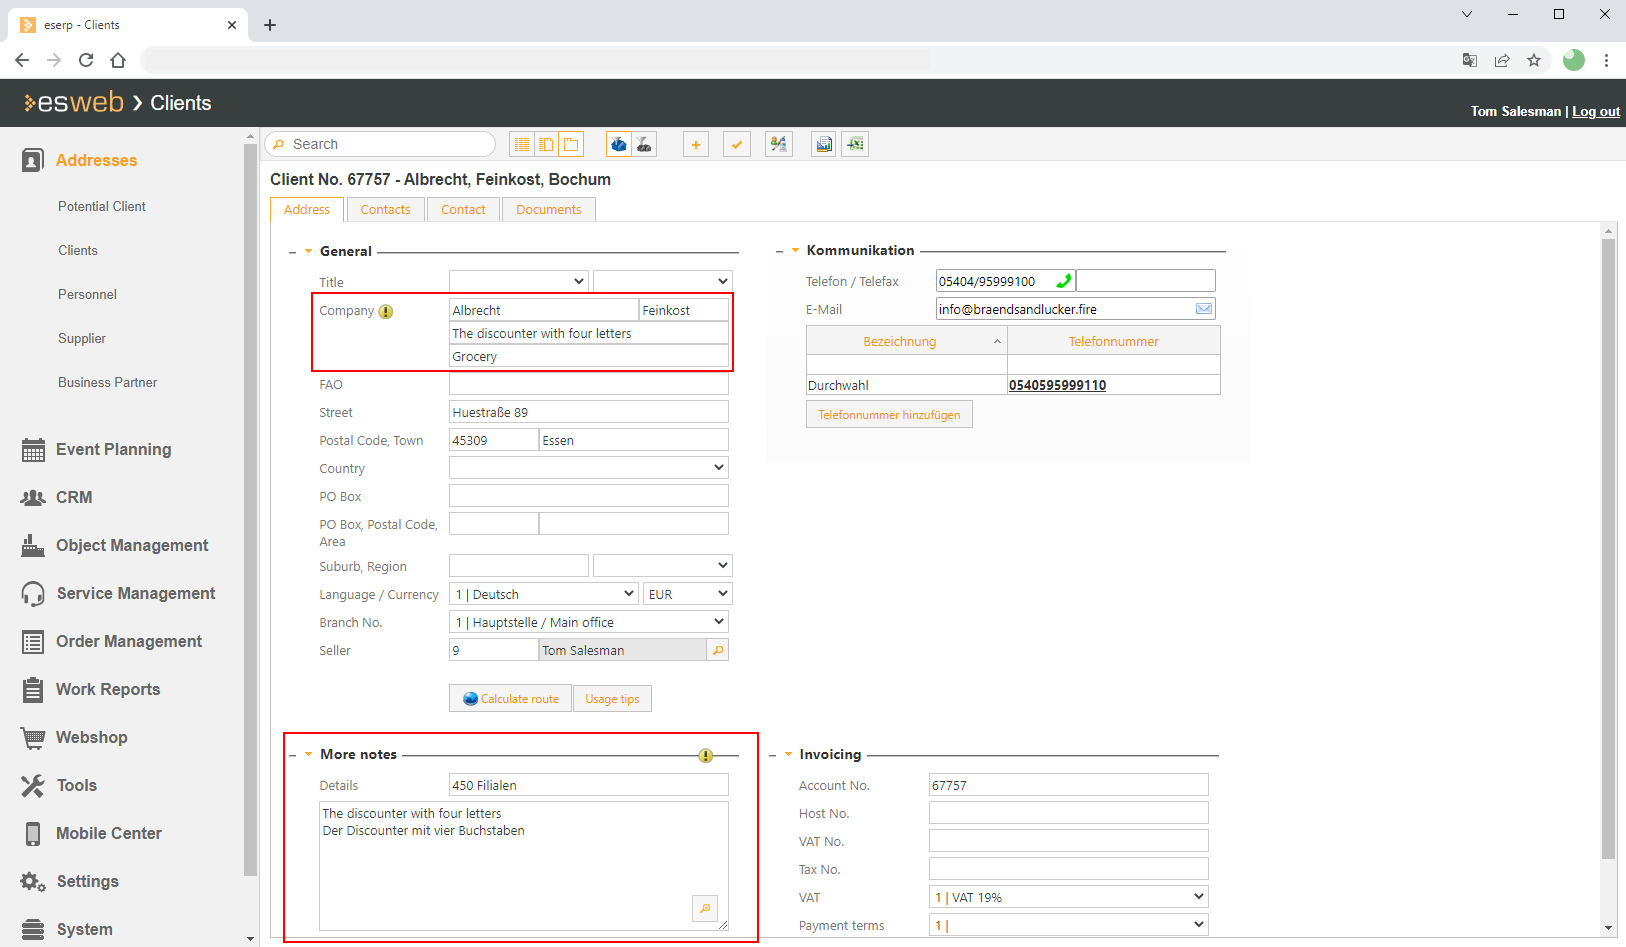
In the following example, the following changes will be made to the Clients | Address form:
-
The Company / Name / First name field is specified as a required field.
-
An error message is specified to be displayed if the required field is not filled out before the client is saved.
-
The Label of the field is changed from Company / Name to Company.
-
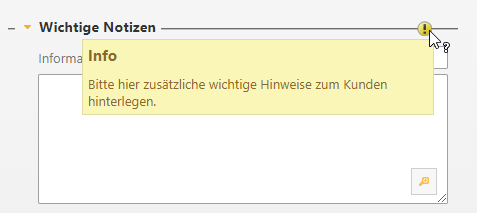
A Hint for filling out the form is recorded, for example, giving details of the information that should be entered in the field.
-
-
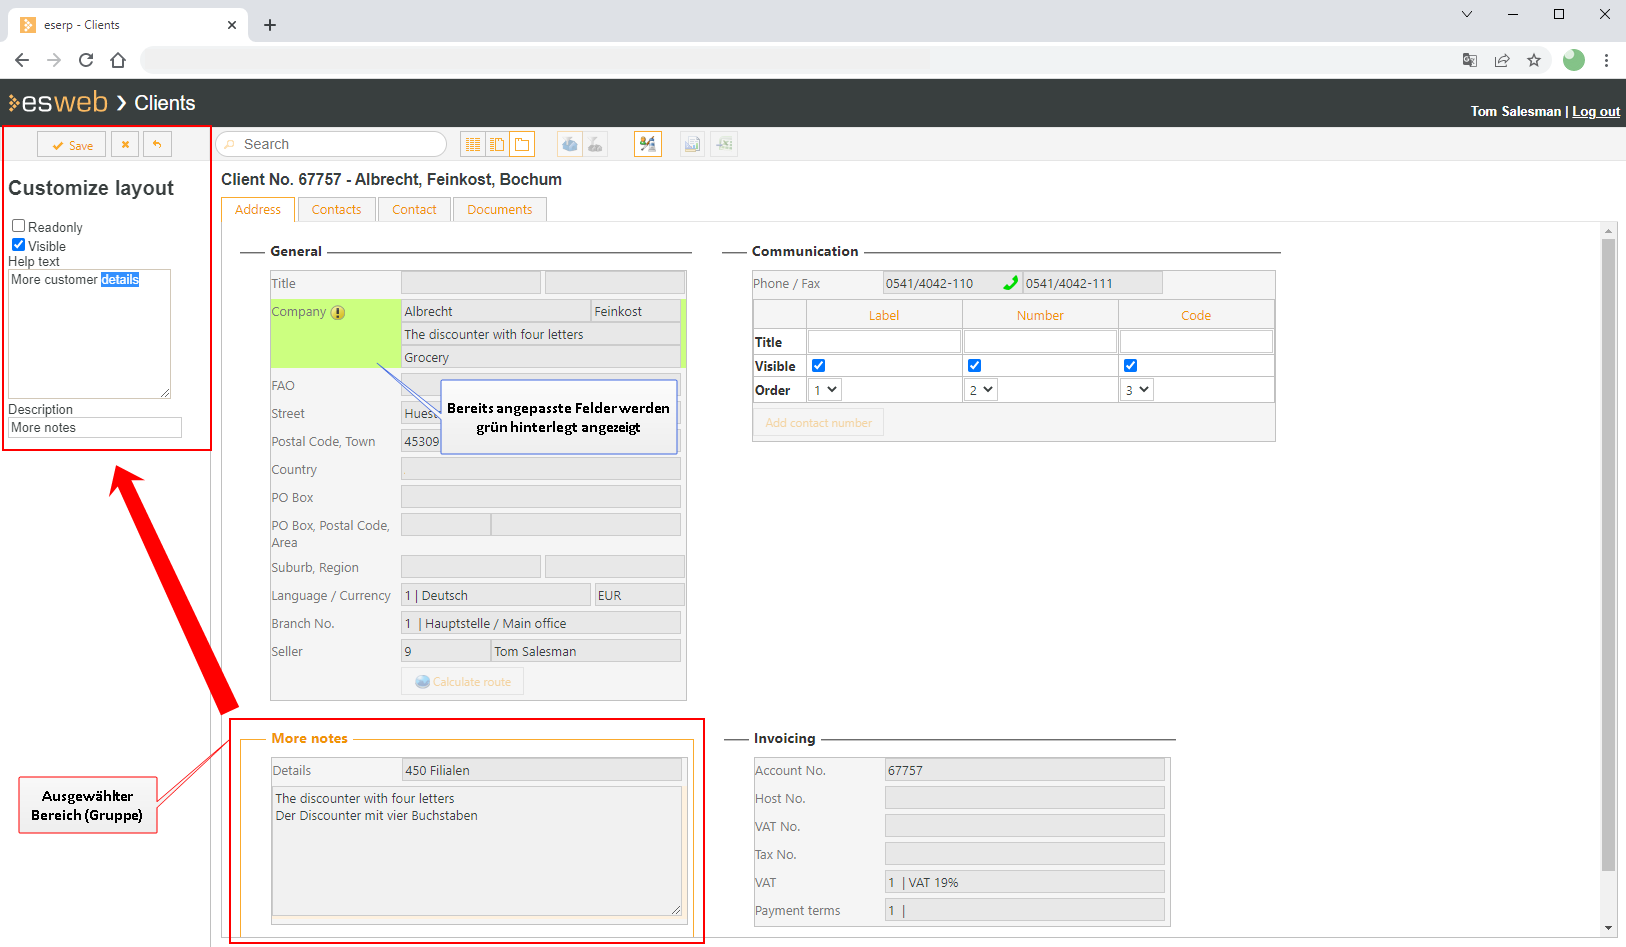
Click on the component that you want to customize. The Company / Name / First name field is used in the example.
You can now customize the properties of the field in the Layout area.
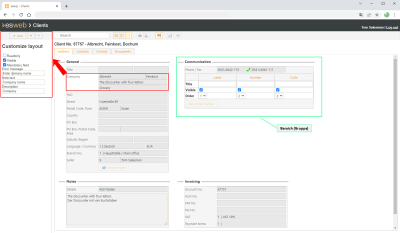
Customizing view using the Clients Address tab as an example
-
Customize the properties according to your requirements.
Read only
If this option is set, you can view the field but it cannot be edited.
Visible
This option is used to show or hide the field. If the option is activated, the field / element will be displayed on the user interface.
Mandatory field
If this option is activated, the field must be filled out when making entries in esweb. If the field is not filled out, the corresponding data set cannot be saved or a function cannot be completed.
Error message
This field is only available when the Required field option has been activated. The text entered here is displayed as a warning message if you try to save the data set when the required field has not been filled out.
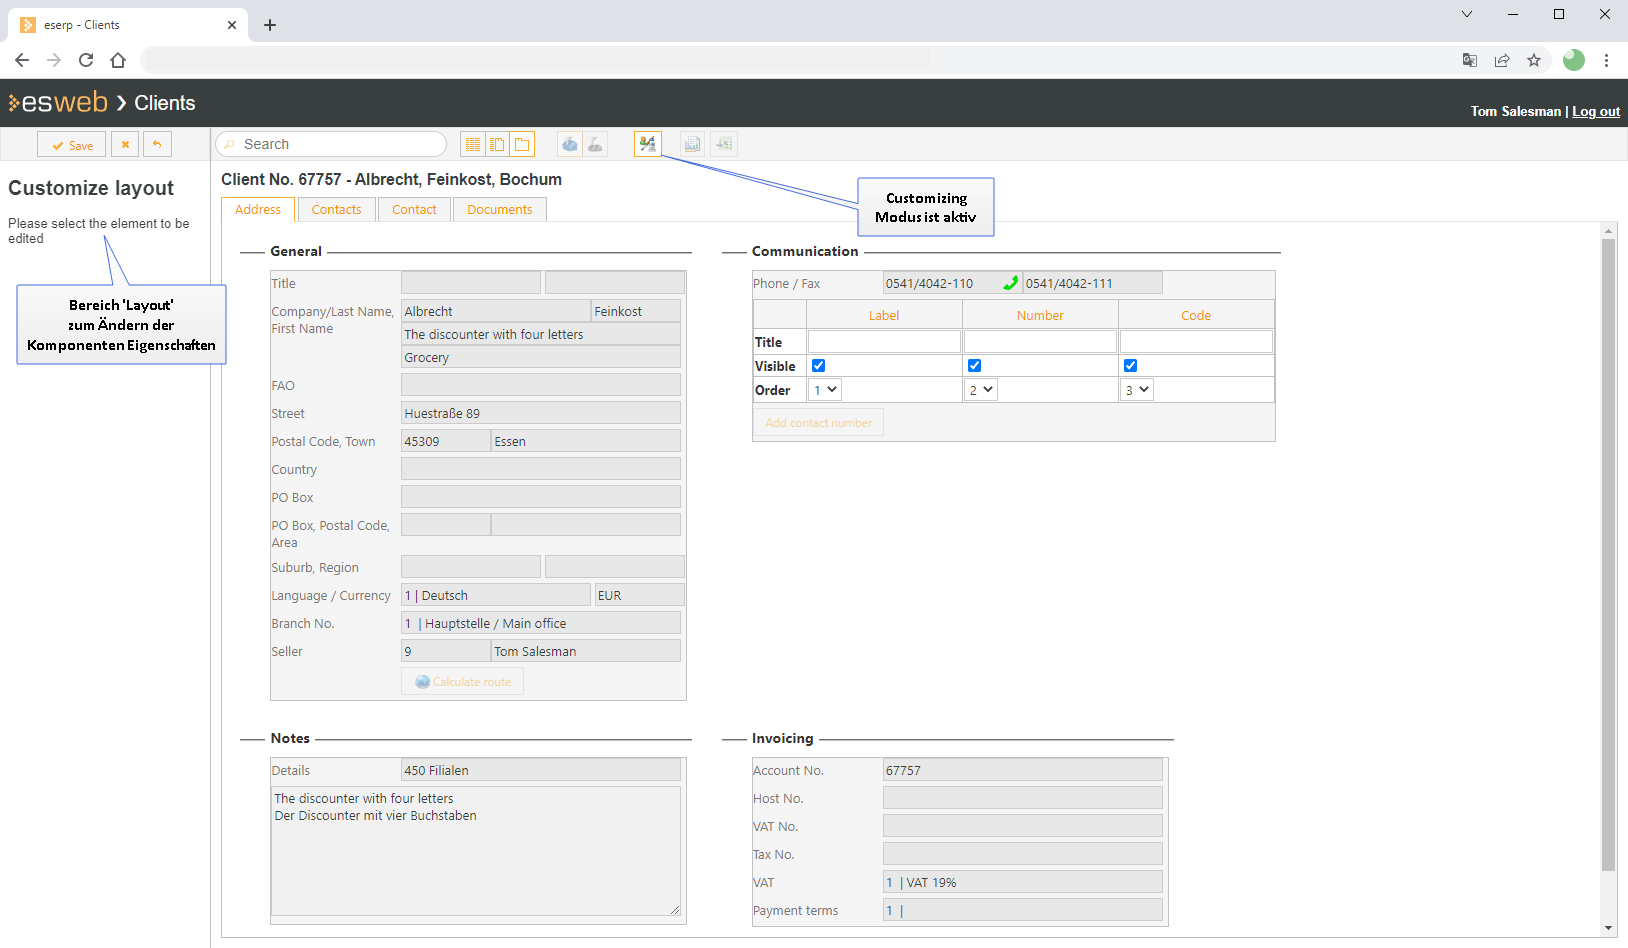
Hint
You can enter hints on how to fill out the field here.
If you enter a hint text, the hint icon
 will be displayed next to the corresponding field.
Label
If you want to customize the existing labels, you can enter the label text here.
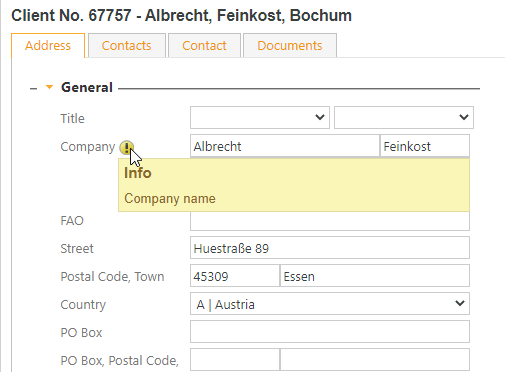
Help text
The help text is only available when an area is altered. It provides a hint about the area by means of the
 icon.
icon.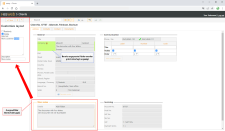
Dispplaying the help text for an area (hover mouse pointer over the
icon)
-
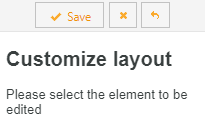
When you have made all the changes you want, click on the
 Save button.
 -
The editied form is displayed.


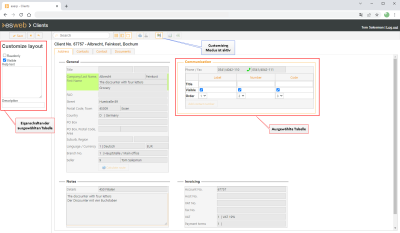
Customizing tables
Tables can also be changed using the customizing function.
You can make fundamental changes to a selected table in the Layout area.
You can specify the visibility and labeling of the table columns. You can also change the order in which the individual columns are displayed.
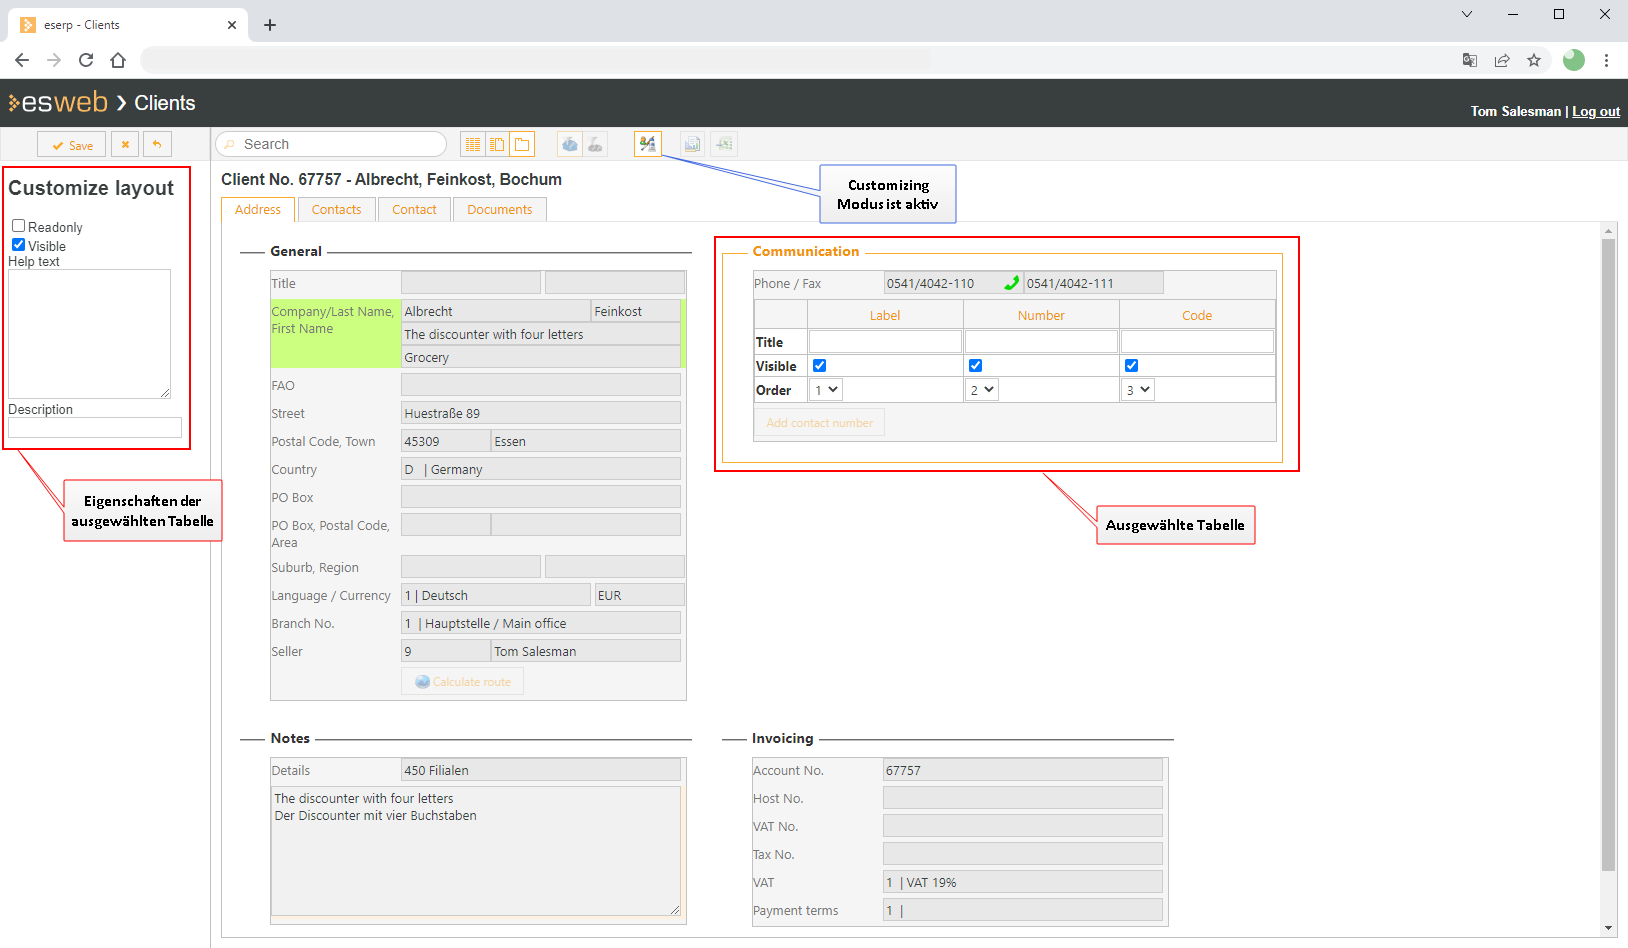
Customizing view using Clients -> Communication as an example
Title
You can define a different column header here. If you do not enter a different column header here, the default header will be displayed.
Visible
Controls the visibility of a table column. If the Visible option is deactivated, the column will be hidden.
Sequence
Specifies the order from left to right in which the columns are to be displayed.
The final result for the example with hidden column and changed label for the Telephone number field looks like this:
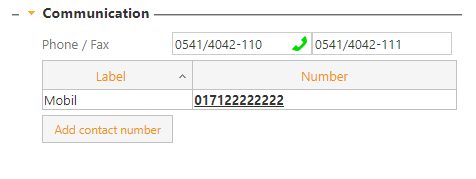
View of the Clients -> Communication table after editing
Reset customizing
You can undo the customizing for an entire form.
Clear all customizing settings
-
Open esweb.
-
After logging in, open the form for which you want to undo the customizing settings.
-
Click on the
Edit layout button in the toolbar. -
The form is set to Customizing mode and the Layout area is shown on the left hand side.
-
Click on the
 Reset button in the Layout area.
A warning message is displayed:
Do you really want to reset the customized settings for this page? Warning: All settings made on this page will be lost.
-
To reset the customized settings, click on the OK button in the message.
You cannot undo a reset of the Customizing settings.
-
The form is loaded with the default settings.