Register app for Exchnage online
The following is a briefly describes linking an Exchange online account for the authentication procedure Application authentication with OAuth 2.0 (IDs, secret) in esExchange.
This description is intended for administrators and assumes fundamental knowledge of and authorizations for the Microsoft Admin Center, Azure Active Directory, and app registration for Exchange online.
es2000 does not make any recommendation regarding the suitability of the following information. Errors and exceptions are excluded and no responsibility is accepted for the information provided. The statements are simply descriptions and do not guarantee the consistency of the products. The information may also in part be regarded as an attempt to provide you with assistance for a task even if the product was not actually intended for this special purpose.
App registration
-
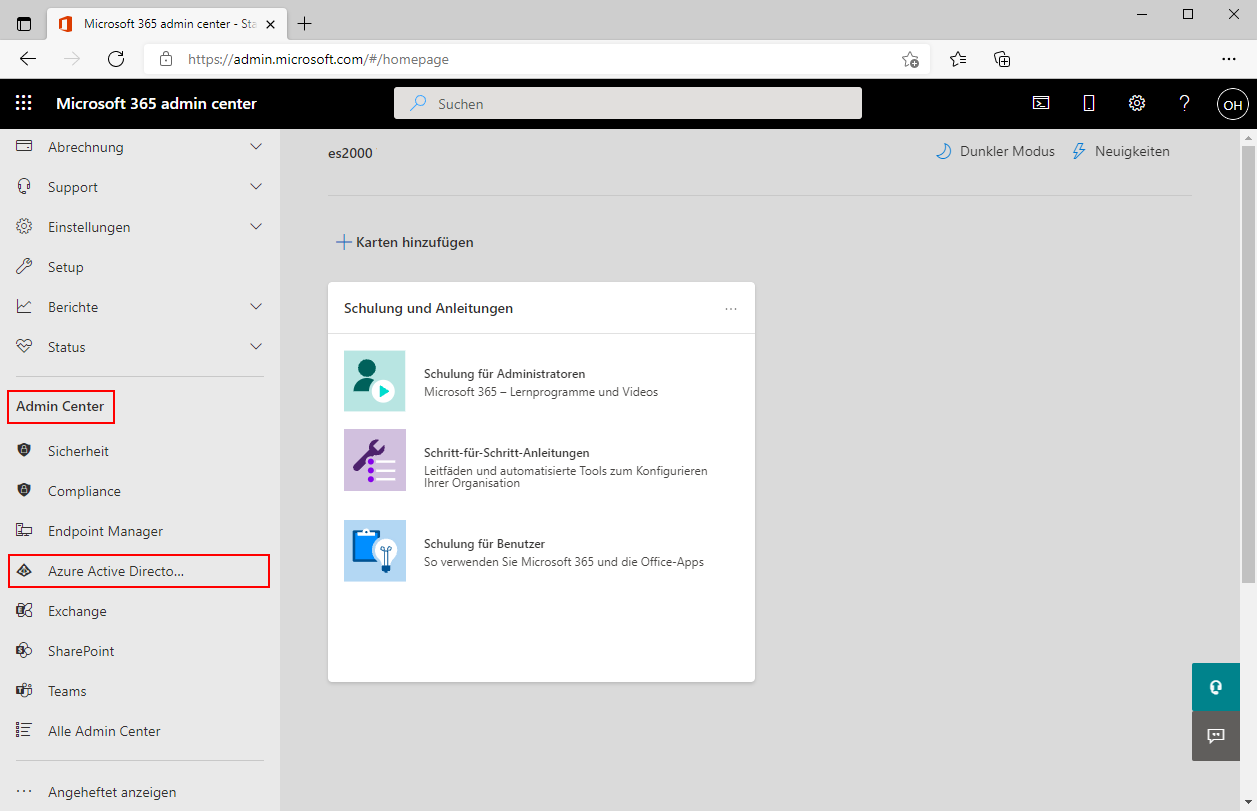
Log in to Microsoft Admin Center with the corresponding authorization.

-
Select the Azure Active Directory in the Admin Center area.
The Azure Active Directory Admin Center opens.

-
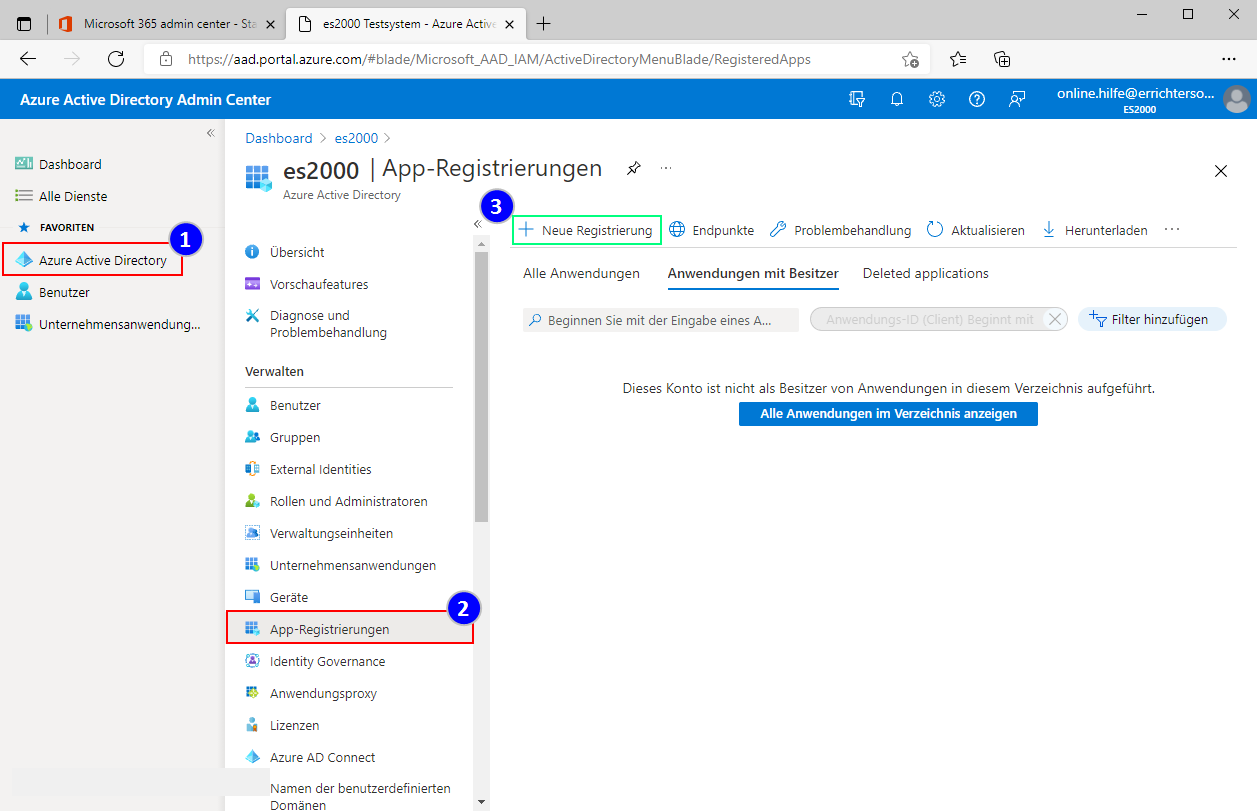
In the left hand menu, select Azure Active Directory (1). Another menu containing the corresponding management information opens.
Select App registrations (2) in this menu and select the function + New registration there.
-
The Register application entry form opens.

Enter a name for the app registration and select one of the options under Supported account types.
The option you select in the Supported account types area will depend on the structure of your organization. More information about this is provided via the Decision help link below the options.
Then click on the Register button.
-
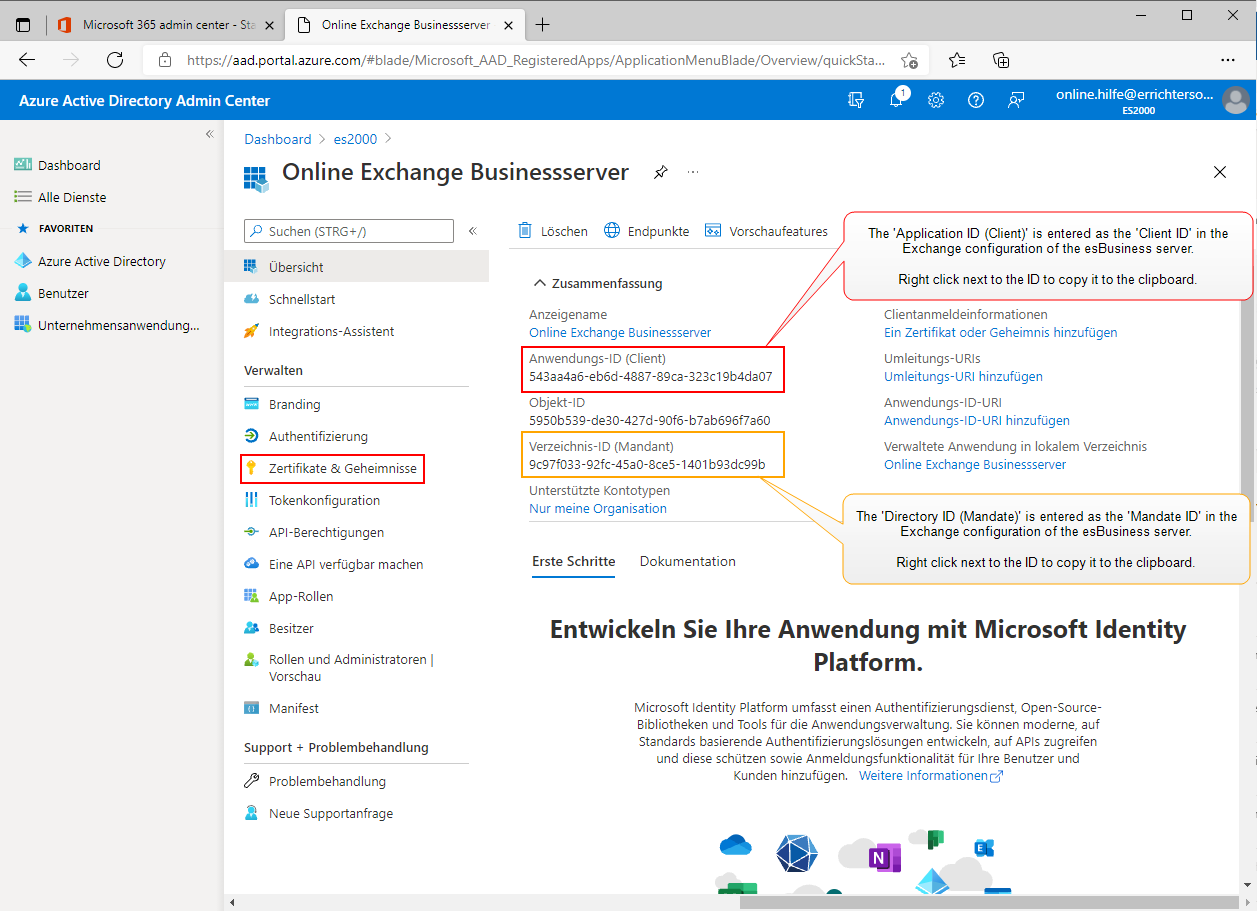
The app will be registered under the name entered and a summary will be displayed.

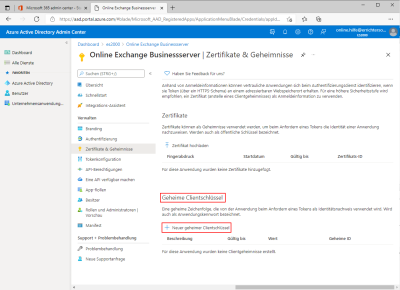
To generate the client key for the app, click on the Certificates & secrets command in the menu in the Manage area.
-
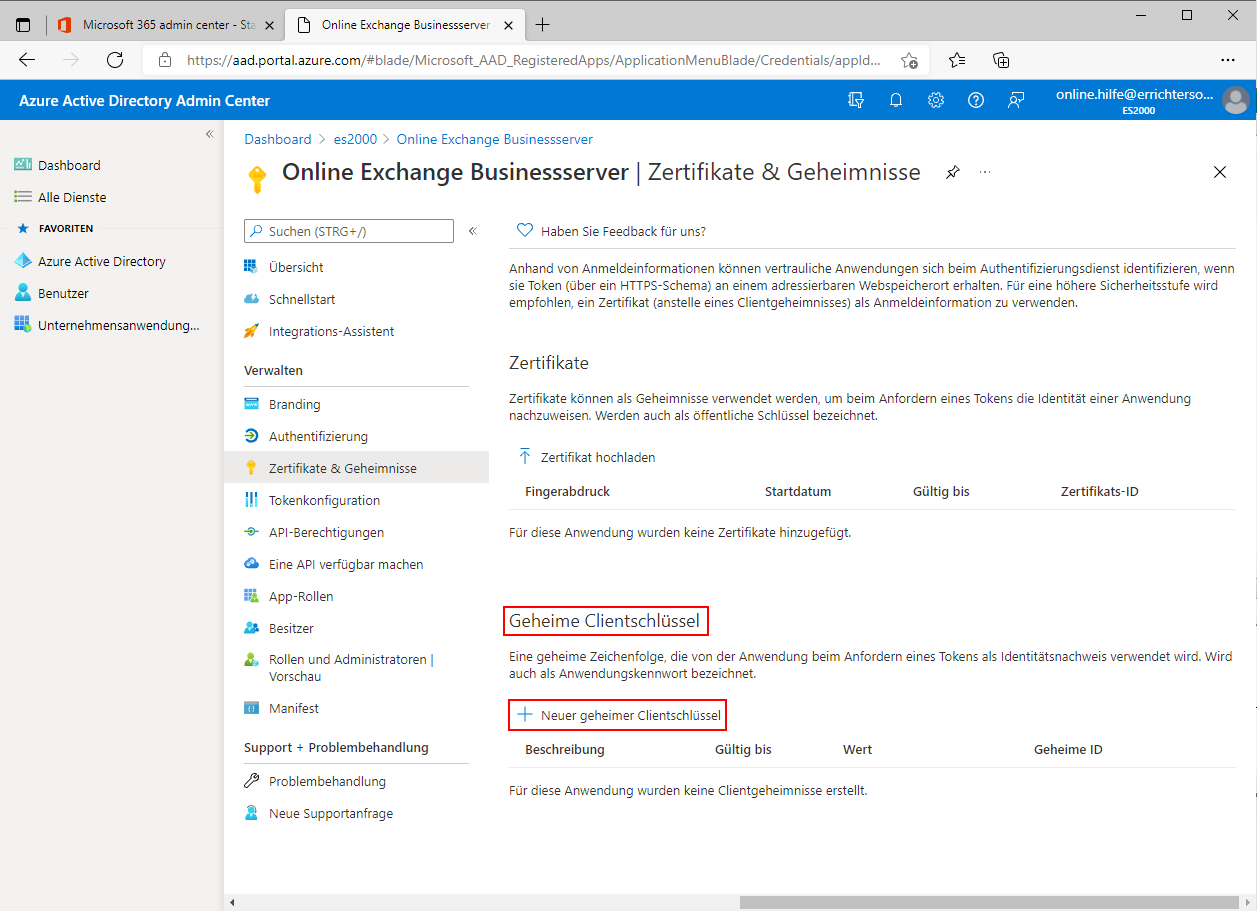
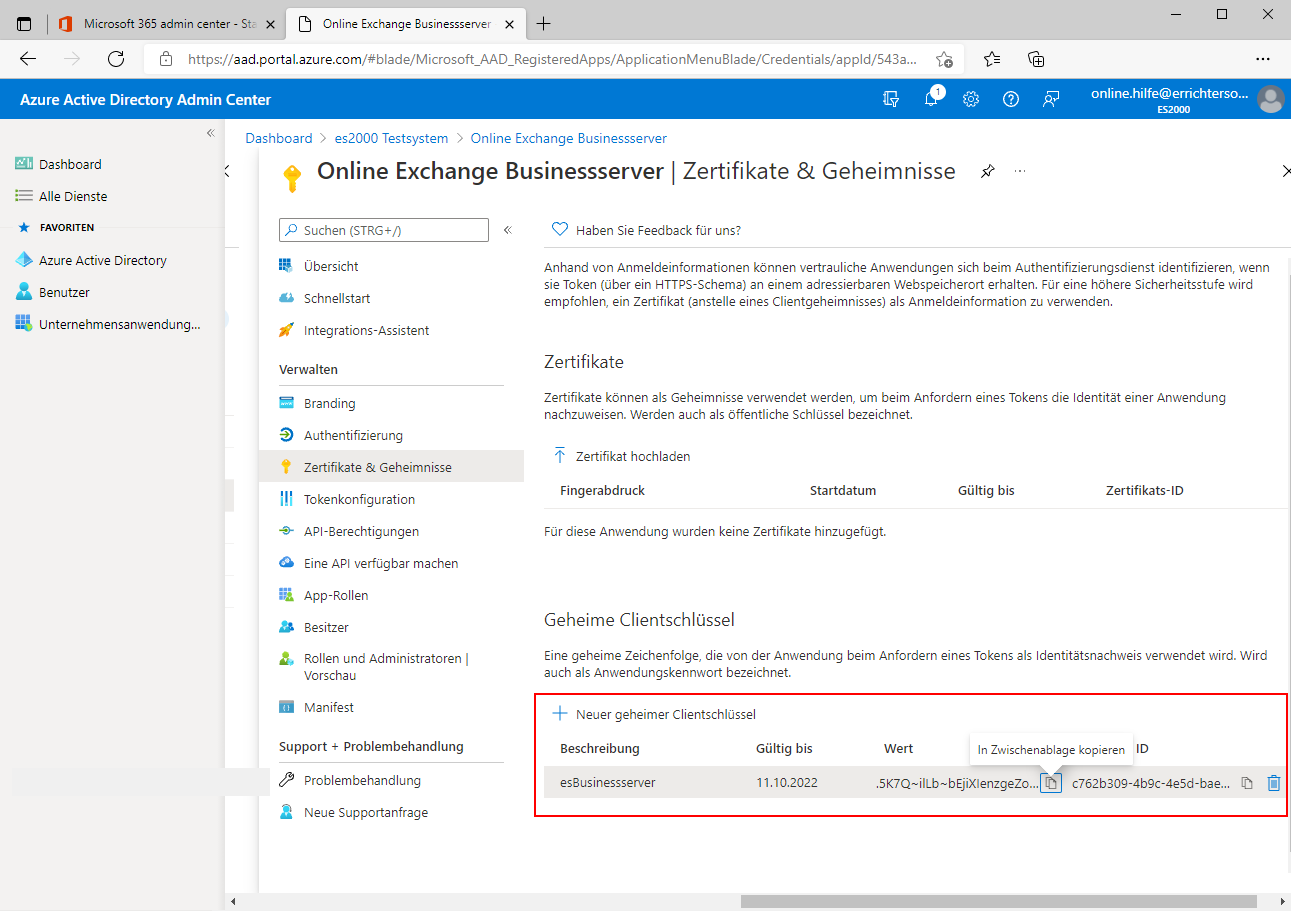
Click on the + New secret client key function in the Secret client key area.
-
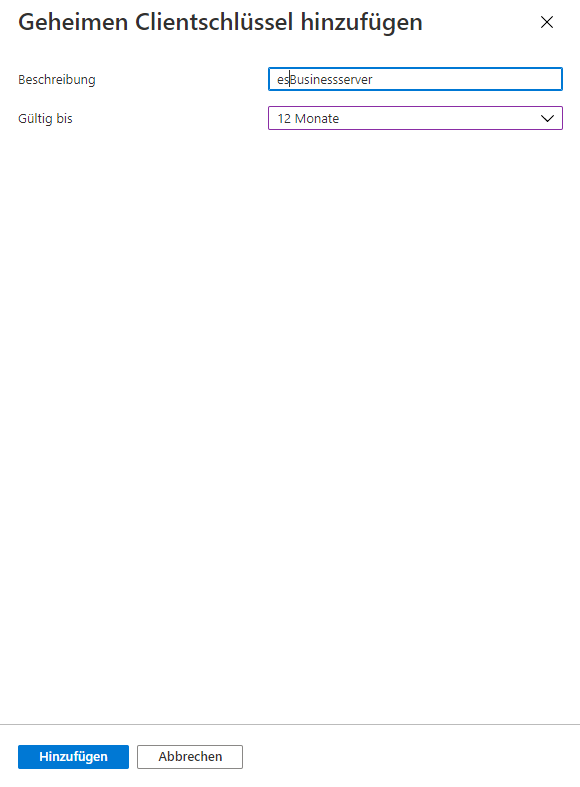
Enter a description for the key and specify its validity in the Valid until field.

Click on the Add button.
-
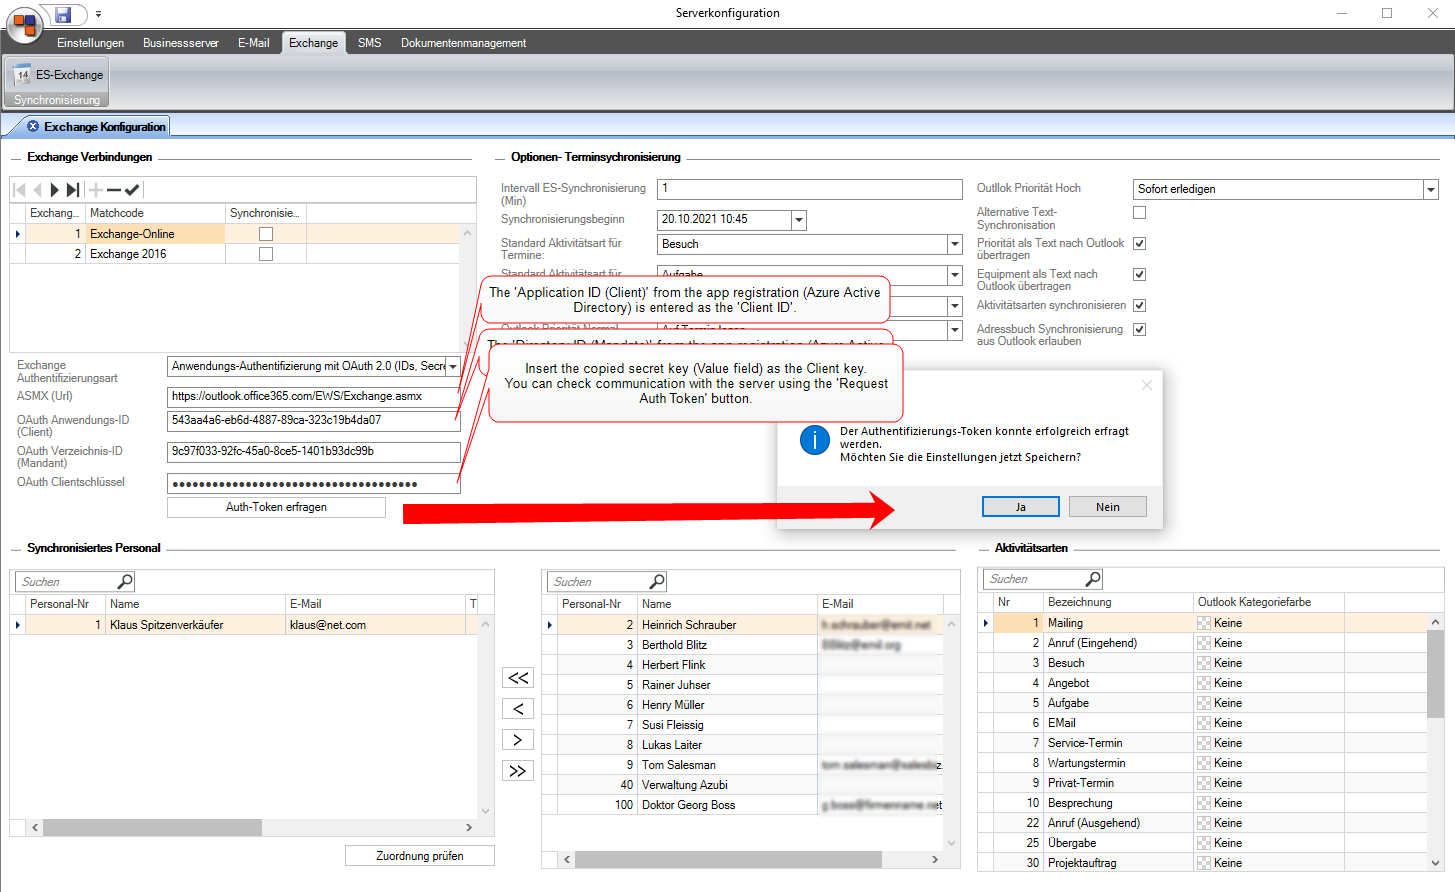
The newly generated key will now be displayed. Copy the key shown under Value to the clipboard and paste this value into the Client key field in the esExchange configuration.
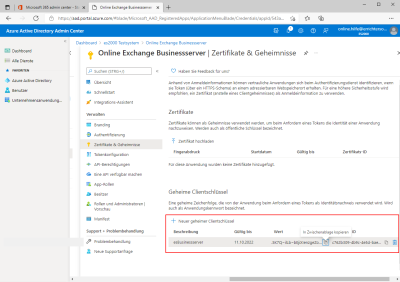
The key is only displayed in clear text directly after it has been generated.
The key must be copied immediately after it has been generated. It cannot be copied at a later time.

-
Once the values have been entered in the esExchange configuration of the esBusiness server, click on the Request auth token button.
If communication with the server is successful, the authentication token will be transferred. To save the token, click on the Yes button in the corresponding message.
-
The authorizations for the business server need to be adjusted in the next step.
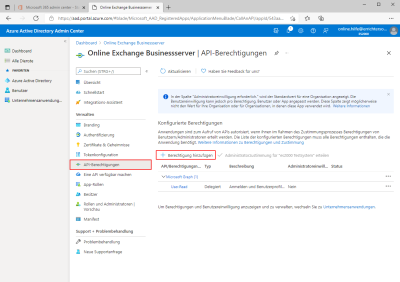
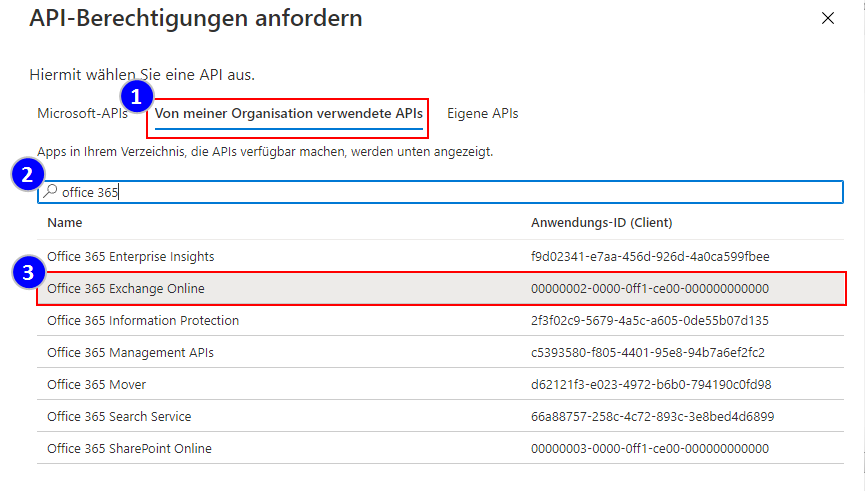
For this, select API authorizations in the menu. The + Add authorization function opens the Request API authorization dialog.

-
Select the APIs used by my organization area (1).
Type Office 365 in the search box (2) and select Office 365 Exchange Online from the search results (3). The type of authorization is specified in the next step.

-
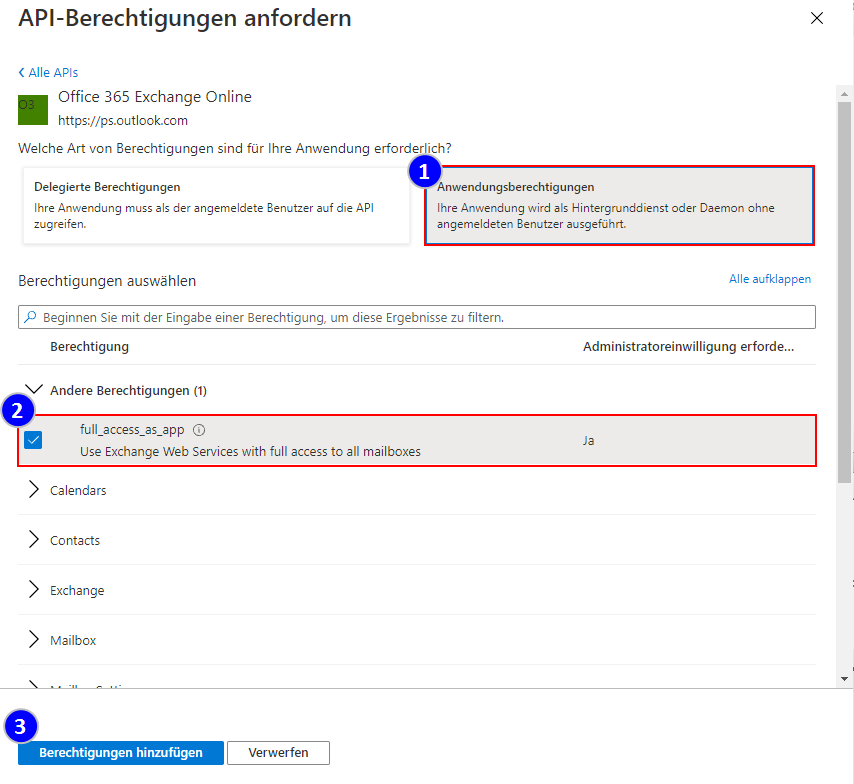
Click on the Application authorizations selection (1). The associated authorizations are displayed underneath.
Select full_access_as_app under Other authorizations (2) and then click on the Add authorizations button (3).
The authorizations will be entered.
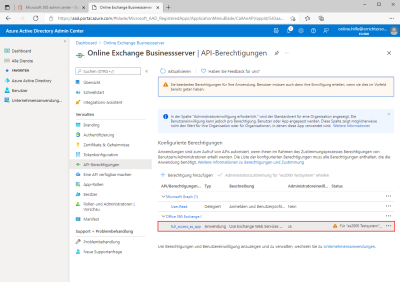
These authorizations still need to be approved by an appropriately authorized administrator. To do this, follow the link underneath the newly registered authorization.
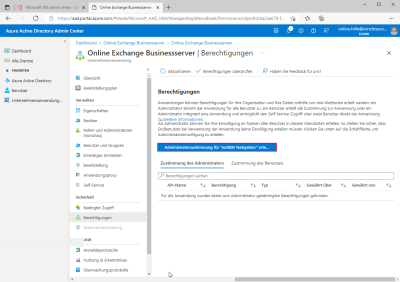
-
This completes registration of the esBusiness server.