Example process Order type
The following example describes the creation of a workflow for determining the Order type of a Project order.
In the business rule, each Order type is assigned to a responsible team that receives the tasks for order planning in a sub process. In addition, in the simplified Plan order sub process, tasks are assigned to three teams. After the Plan order sub process has been completed, the workflow continues in the main process.
If it is not possible to assign an order type to a team because it has not been defined in the business rule, the workflow ends with a error end event.
The example consists of two workflow processes (main process and sub process) and one business rule.
References
The following references are used in this example:
Project order types
Settings | Project | Project management | References | Project order types
|
Order type |
Description |
|---|---|
|
10 |
BMA |
|
20 |
RWA |
|
30 |
EMA |
|
etc. |
|
Teams
Settings | General | General | References | Teams
|
Team no. |
Team name |
|---|---|
|
10 |
Sales |
|
15 |
Sales management |
|
20 |
Tech |
|
22 |
RWA |
|
24 |
EMA |
|
26 |
BMA |
|
30 |
Internal service |
|
40 |
Warehouse |
|
etc. |
|
Creating the business rule
-
In the toolbar under Workflow | Business rules, first click on the Edit button and then on the
 Add rule button.
 -
On the Table tab, click on the
 icon (pencil) and enter a meaningful name for the business rule in the dialog, for example: CheckOrderType.
 -
Under Input, click on the
button to create a name for an input parameter (OrderType). -
Repeat this process for the Output parameter (OutputTeamNo).
-
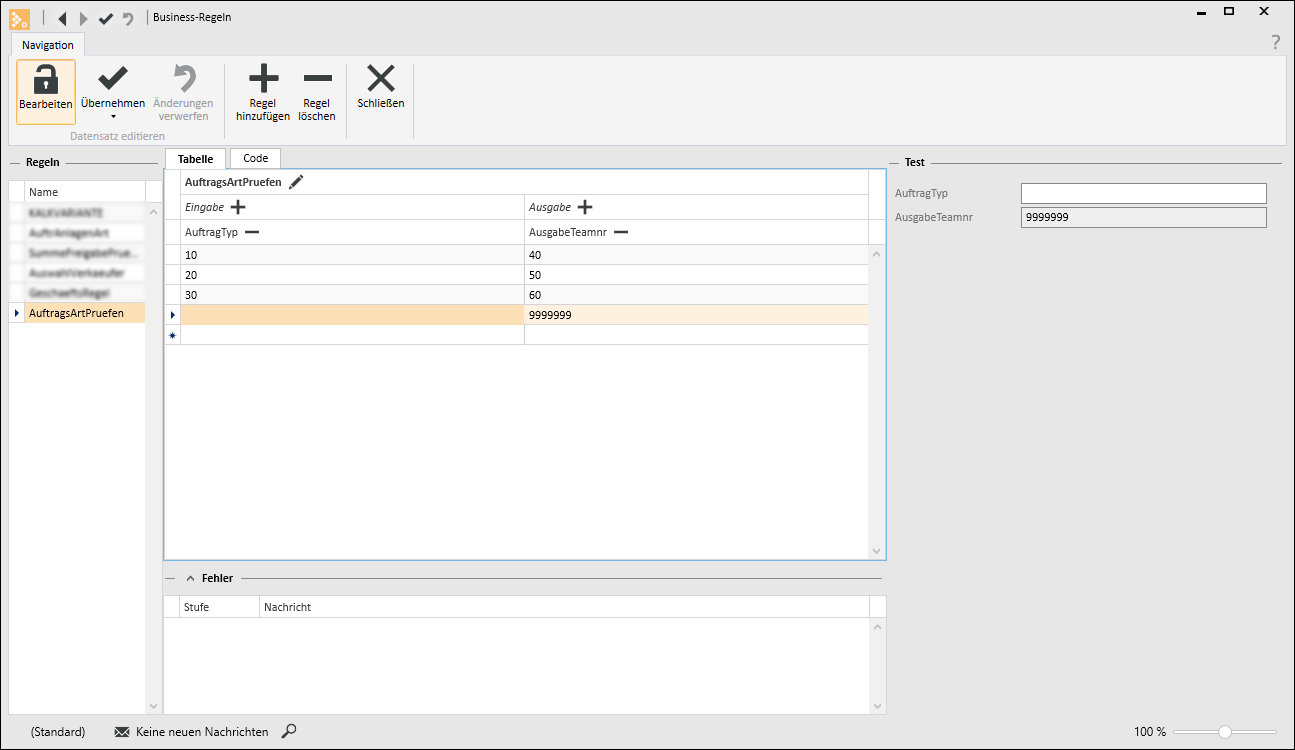
In the rows below the Input parameter name you can now record the possible values of the Order type number for the Project order types.
-
Enter the responsible team number in the Output column for each Order type number.
-
As a corresponding team has not yet been assigned to every possible Order type, an error message is displayed in the Error area. Add a row in which the Input value is left blank and the Output parameter is a non-existent team number.
-
To save the business rule, click in the Navigation toolbar on the
 Apply button.
The business rule displayed in the table is translated into a script (register code).
Business rule code (register code)
CopyGIVEN AuftragTyp
HAS AuftragsArtPruefen: AusgabeTeamnr OF
START
WHEN ([AuftragTyp] = 10) THEN
RETURN { AusgabeTeamnr: 40 };
WHEN ([AuftragTyp] = 20) THEN
RETURN { AusgabeTeamnr: 50 };
WHEN ([AuftragTyp] = 30) THEN
RETURN { AusgabeTeamnr: 60 };
RETURN { AusgabeTeamnr: 9999999 }
END
Creating the sub process
The sub process is invoked from the main process in order to perform certain workflow steps. The example used here is highly simplified and could be incorporated in this form into the main process. If you use a process repeatedly in different parts of your company, these can be set up as sub processes.
'Details' tab
-
In the toolbar under Workflow | Processes click on the Create process button.
-
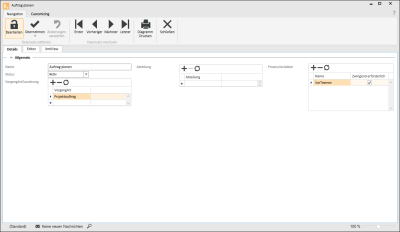
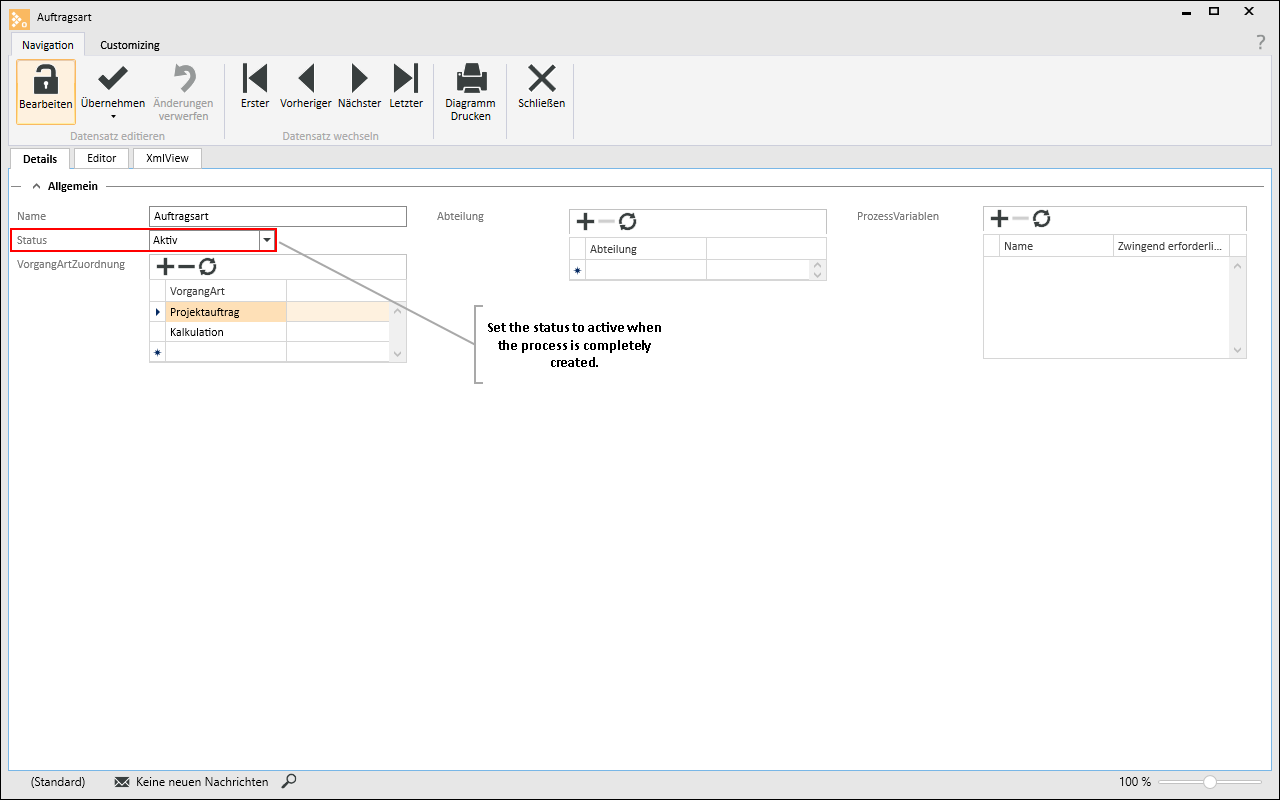
Enter a meaningful name for the process in the Name field, for example: Plan order.
-
Add the Process type Project order under ProcessType/Assignment.
-
In the ProcessVariables area, create a Variable VarTeamNo with the option Absolutely necessary.

'Editor' tab
You can design the process graphically in the Process editor with the help of BPMN elements that you can simply drag (press and hold down the mouse button) as icons from the toolbar on to the workspace.
-
Set up four swimming lanes on the workspace (Responsible team, Internal service, Tech, Warehouse). In the Settings, you can assign the teams that you have already created. In the Responsible team swimming lane, set the Type to Variable_Team and select the Process variable VarTeamNo.
-
Add a Start event.
-
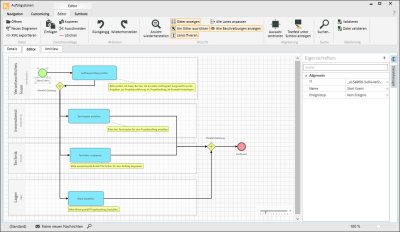
The rest of the diagram consists of tasks, parallel gateways, and an End event (see screenshot).
In this example, after the Order scope has been checked by the Specialist team (RWA, BMA, or EMA) the further steps are performed in parallel by different teams. When the sub process is completed, the workflow continues in the main process.
- To save the process, click in the Navigation toolbar on the Apply button.
Creating the main process
'Details' tab
- In the toolbar under Workflow | Processes click on the Create process button.
- Enter a meaningful name for the process in the Name field, e.g. Order type.
- Add the Process types Project order and Calculation under ProcessType/Assignment.
'Editor' tab
You can design the process graphically in the Process editor with the help of BPMN elements that you can simply drag (press and hold down the mouse button) as icons from the toolbar on to the workspace.
-
Set up two swimming lanes on the workspace (All teams, Tech). In the Settings, you can assign the teams that you have already created.
-
Add a Start event.
- Drag a Data object on to the workspace and select Create new.
Data type: Process type
Process type: Project order
-
Connect the Start event to the Data object.
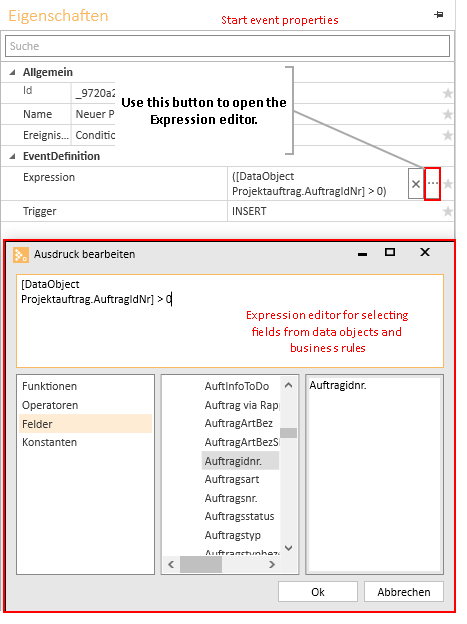
- Edit the Start event Settings.
Event type: Condition
Expression: [Project order.OrderServ.OrderSeqNo] > 0
The expression (condition / expression) is put together in the Expression editor.
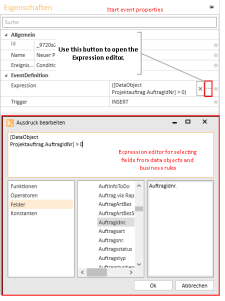
Trigger: INSERT
- Drag a Task on to the workspace, connect the Start event to the Task and adjust the following settings:
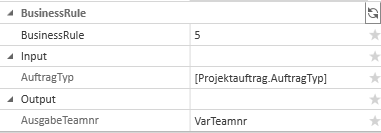
- Task type: Business Rule Task
- Business rule: select the CheckOrderType business rule
-
Select the [Project order.OrderType] field under Input in the Expression editor | Fields.
-
The Output team no. parameter is preset from the business rule under Output. Enter a name for the variable, for example VarTeamNo on the right next to it.
-
Place an Exclusive gateway below the Task and connect the Task to the Gateway.
-
Add a Sub process and an End event, and connect them both to the Gateway.
-
End event Event type: Error
-
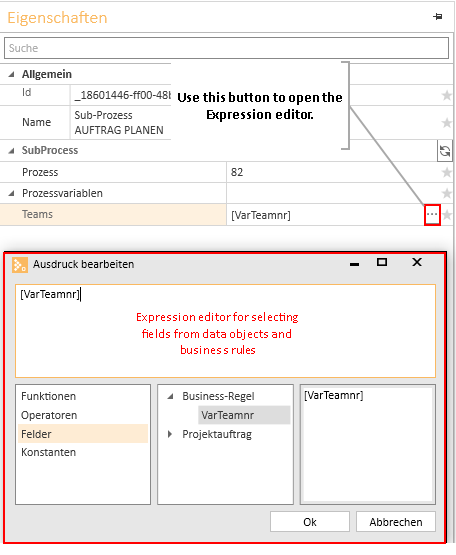
Sub process properties: Select the Plan Order process, select the Process variables from the business rule in the Expression editor | Fields.
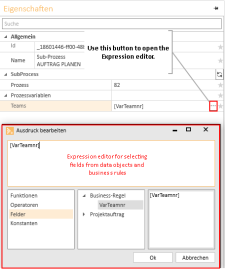
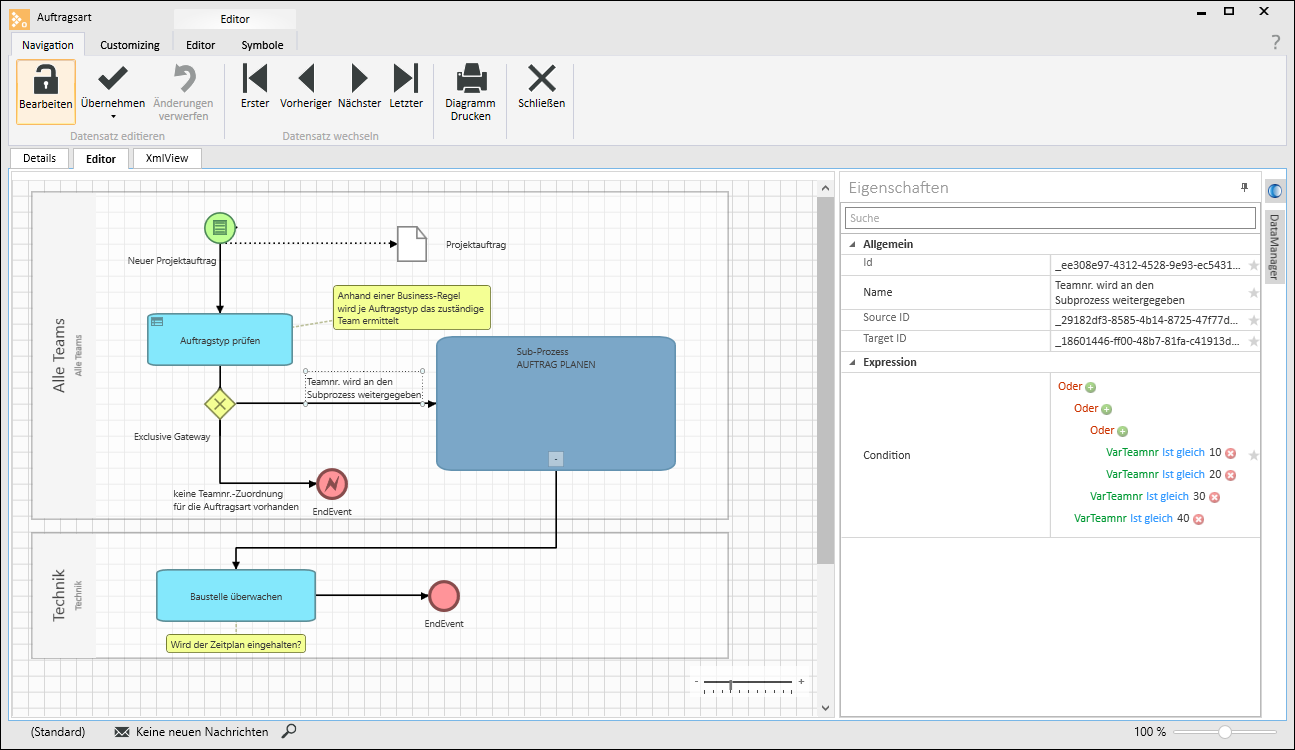
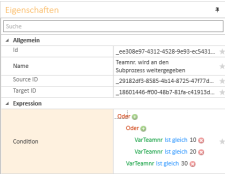
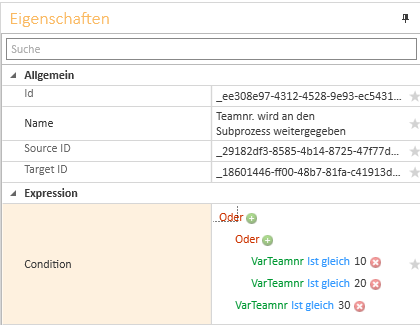
One more condition is required in the sequence flow from the Gateway to the sub process: Only certain Team nos. (determined by the business rule) are forwarded. A corresponding condition can be put together under Expression (Condition).
-
-
One more Task in the Tech swimming lane is connected to the sub process.
- The last step is to insert an End event.
Overview of main process and sub process

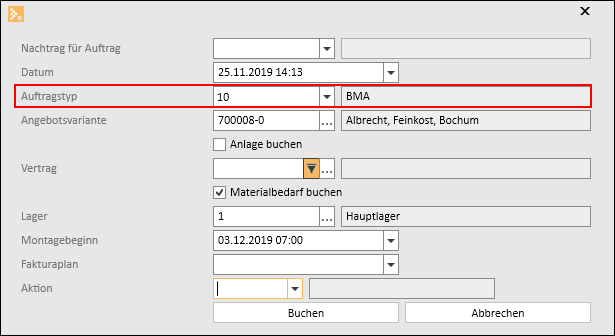
Start of workflow process
The Process starts as soon as a Project order is booked in the Calculation. In the Booking window, you can then select the Order type. which is then evaluated in the workflow by the business rule.