Fax
The settings for sending labor reports by fax are made on the Settings | General | Labor report - Fax tab.
General | Administration | Basic settings authorization is required in order to display and edit these settings.
Settings set
If you have a license for further Office branches, you can collect certain settings together into a Settings set.
If you have recorded several Settings sets, use the drop down menu to select a Settings set and the associated settings that you want to edit.
If you make settings in this type of settings form, they will only be saved in the settings set that is currently active.
Additional information about the Settings set functionality (creating a Settings set, Assignment to an Office branch) is found under Settings sets.
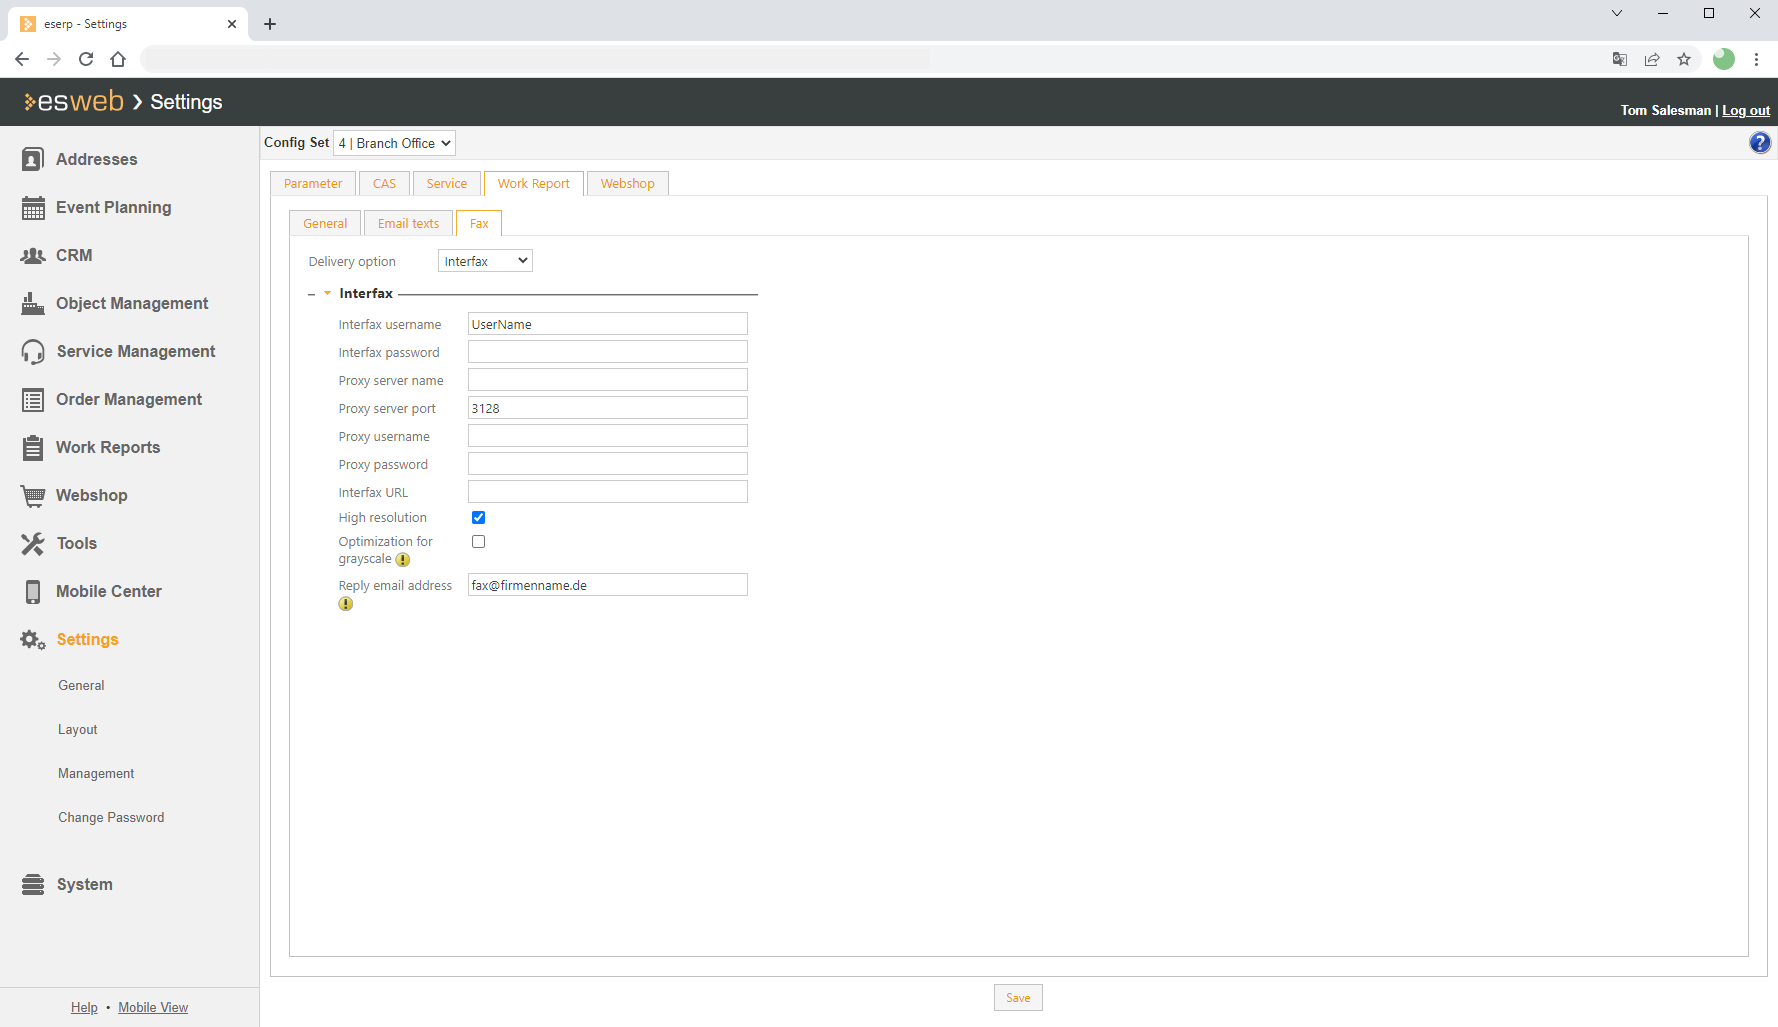
Labor report by fax settings
Send facility
You can specify here how the labor reports are sent by fax if you use this facility. We recommend the use of the Interfax online service (www.interfax.net).
Delivery type: Interfax
You will require an account with this fax provider (chargeable).
Interfax user name / Interfax password
The access data for your Interfax account.
Proxy server name / Proxy server port / Proxy user name / Proxy password
Enter the corresponding data here if your esweb is hidden behind a proxy server.
Interfax URL
The web address for Interfax fax transmission. This is obtained from the provider.
High resolution
If you select this option, fax messages will be sent with the highest resolution.
Grayscale optimization
Fax transmission is optimized for monochrome by default. Adjustment for grayscale is made if you select this option.
Reply email address
Status messages regarding fax transmission will be sent to the email address given here. If no email address is entered here, the email address given in your Interfax account will be used.
Delivery type: Lotus Notes
Send fax by Lotus Notes
Activate this option to send faxes from Lotus Notes.
Fax server
Enter the IP address or the name of the fax server here.
Saving the settings
After you have made changes, save the settings using the Save button located in the lower part of the settings tab. A corresponding message is displayed at the bottom of the web page if the save process was successful.

If you switch to another settings tab without saving any changes first, the changes will be lost.